5.1. FTP upload
5.1.1. FTP upload presets
By configuring settings for FTP uploads in advance (FTP upload presets), you can send the data to an FTP server more smoothly.
The rules for renaming files when uploading can also be changed here. Up to 30 FTP upload presets can be saved.
-
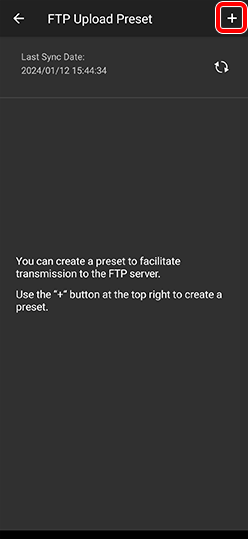
Creating a new FTP upload preset
Select Menu
 > [FTP Upload Preset]. Tap [+], and enter the required items.
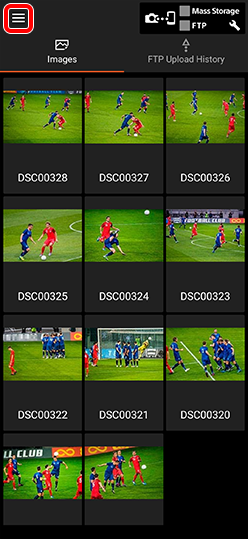


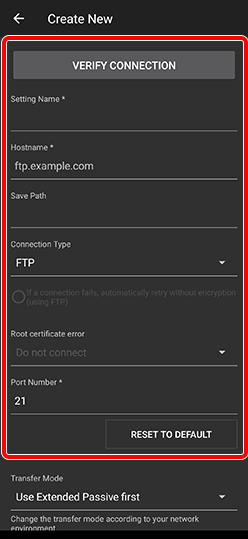
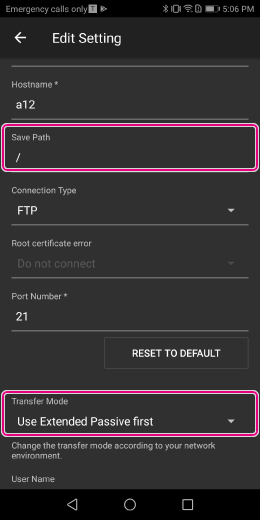
[Save Path]
Images will be saved to the corresponding path name from your home directory on the FTP server.
[Transfer Mode]
If the FTP upload does not work, changing the Transfer Mode may fix the issue.
[Rename File when Uploading]
Target files can be given unique names when they are uploaded, so that they can be easily identified.
The file names consist of a fixed string and a sequential number.
Example: Sony0001, Sony0002...In Menu
> [FTP Upload Preset] turn on [Rename File when Uploading]
In the [File Name Pattern] field, enter a value of your choice using letters, numbers and symbols.- Up to 251 characters can be entered. The following characters cannot be used: (¥⁄:*?"<>|)
- Enter [#] in the place where you want to add the number.
In the [Start Number (Also Specify Number of Digits)] field, enter the number to start from.
- The number will count up for each file uploaded.
- Numbers can be up to eight digits long. Default value: [0001]
- In the default setting (four digits), the counter returns to 0001 after reaching 9999.
- The counter will be reset if you change the fixed string part of the file name.
* This setting can be changed for each [FTP Upload Preset]
Please configure these when you have multiple FTP upload settings.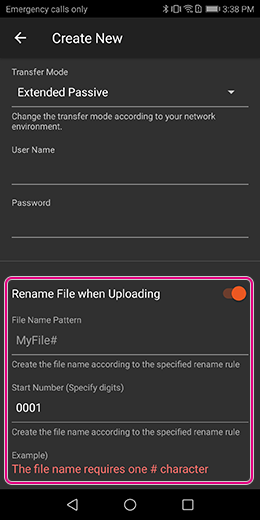
-
Configuring priority settings, editing, and exporting FTP upload presets
- Select (Menu) at the top left of the screen > [FTP Upload Preset].
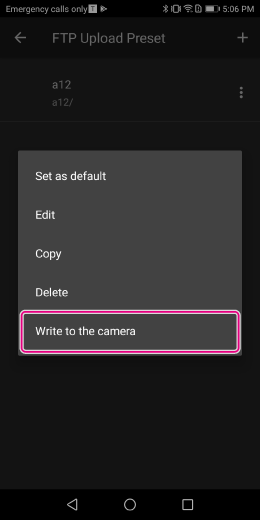
- Tap
 (Setting) to the right of a preset name of your choice and then select the action you wish to perform.
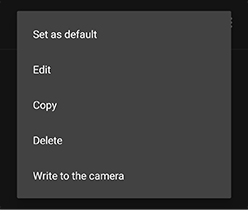 Set as default
When multiple FTP upload destinations are configured, you can specify which server to prioritize by default.
Edit/Copy/Delete
Edits, copies, or deletes the selected FTP upload destination.
Write to the camera
Writes the selected FTP upload settings to the camera. (See 5.1.3.)
Cloud syncing FTP upload presets
FTP upload presets are automatically synced with FTP upload presets in the cloud (Creators’ Cloud). Data is shared between devices using the same account.
- Information with a high security level, such as passwords, private keys, passphrases, and host keys, is not synced. These settings must be configured separately on each device.
- You can share data with devices using a different account by using the online import and export functions. > 4.2. How to use online function
- Cloud functions may not be supported in some countries or regions, so these functions may not be available.
- Select
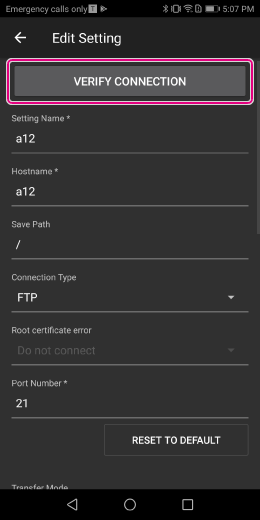
5.1.2. Confirming the connection
Open the FTP upload preset that you prepared (the screen for creating a new preset or editing settings), and then tap [Verify Connection]. You can check the status of connection with the server in advance.
5.1.3. Loading the FTP upload preset to the camera
You can load the FTP upload preset set in the Transfer & Tagging to the camera using Bluetooth communications. This function eliminates the need to input the settings into the camera.
- If [Location Information Linkage] is set to [On] in Creators’ App or Imaging Edge Mobile, this function will not be available. Set it to [Off] beforehand.
- This function is not supported on the ILCE-9, 7RM4A, 7RM4, 7RM3A, and 7RM3.
-
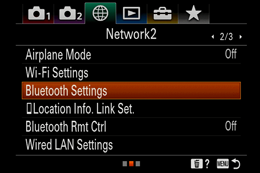
 1. Select Menu >
 (Network) > [Bluetooth]/[Bluetooth Settings] > [Bluetooth Function] > [On].
-
 2. Select Menu > [FTP Upload Preset].
 -
3. Tap for the FTP upload preset that you want to load to the camera, and then select [Write to the camera].
-
4. If a note is displayed, confirm the contents and press [OK].
-
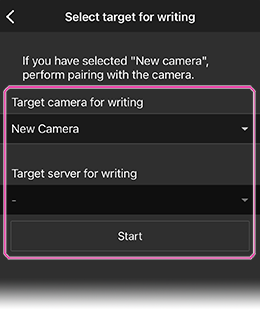
5. Make sure that the camera to be connected is displayed on the screen.
-
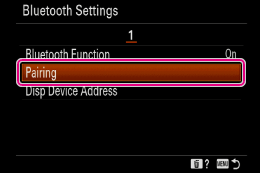
6. Select Menu >(Network) > [Bluetooth]/[Bluetooth Settings] > [Pairing].
-
7. The message [Pairing] will appear on the side of the camera to be connected. Tap the message.
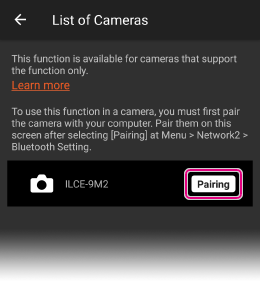
-
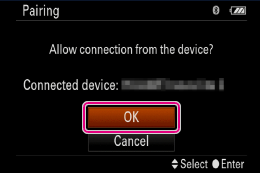
8. The message [Allow connection from the device?] will appear. Press [OK].
* Pairing will start, and the FTP server configuration set on the camera will be displayed on the smartphone. Up to nine FTP server settings can be saved.
-
9. Select an unused server as the destination to save.
* The FTP server configuration will be saved on the camera.
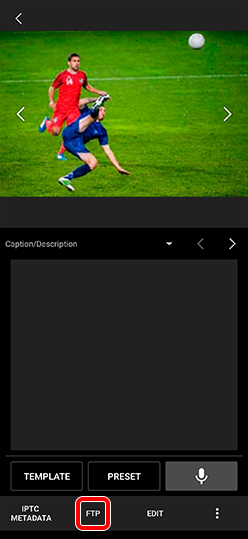
5.1.4. Uploading
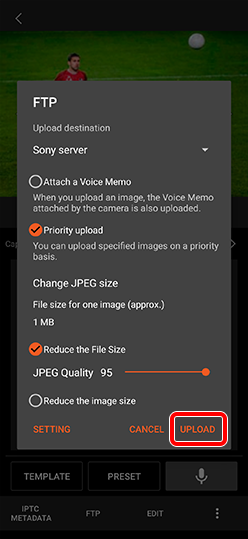
Select an image from the overview and tap [FTP] on the Edit Caption screen. Confirm the destination server and tap [Upload]
At this time,
- Add a checkmark to [Attach a Voice Memo] to upload the images with a Voice Memo attached.
- Add a checkmark to [Reduce the File Size] to compress the files or reduce the image size of the images.
- You cannot change the size of HEIF images.

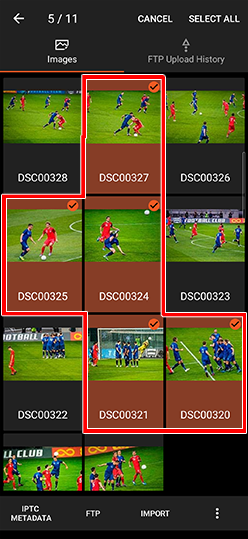
Long-pressing an image in the overview lets you select several images at once. Touch [Select All] to select all the images (up to 500, starting from the most recent). You can then upload all the selected images at once.
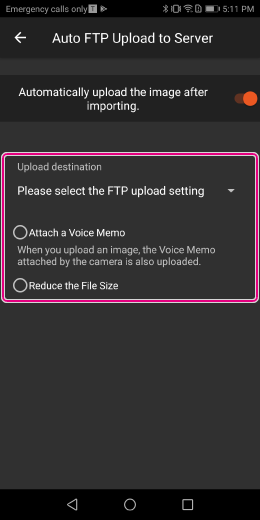
5.1.5. Automatic FTP upload
If you set up automatic FTP upload in advance, the automatic upload will start after the images are imported.
- Select Menu > [Setting] > [Auto FTP Upload to Server]. Then, turn on [Automatically upload the image after importing].

- You need to set [Upload destination], [Attach a Voice Memo], and [Reduce the File Size] in advance.
5.1.6. Checking upload status
FTP server upload status
・・・Uploading
・・・Waiting to upload
・・・Upload complete
・・・Upload error
FTP upload status icon guide
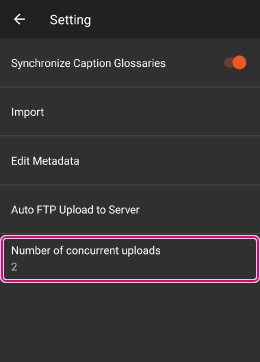
5.1.7. Number of concurrent uploads
You can upload the same images to two different FTP servers simultaneously.
Select MENU ![]() → [Setting] → [Number of concurrent uploads] and set the number of concurrent uploads to 2.
→ [Setting] → [Number of concurrent uploads] and set the number of concurrent uploads to 2.
- If you change the setting while an upload is in progress, the current upload is not affected. The setting takes effect from the next upload.
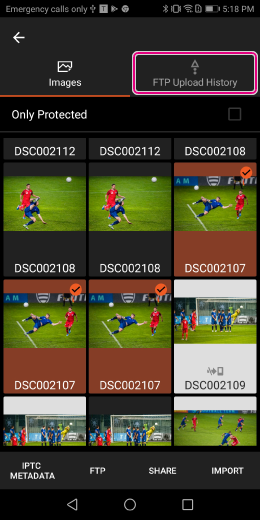
5.1.8. Re-uploading images after the first attempt fails
When you tap [FTP Upload History], the images you tried to upload appear in a color-coded display, as shown below. You can manually select images (or select all images) and re-upload them.

A (black background): upload successful
B (red background): upload failed
C (gray background): upload canceled
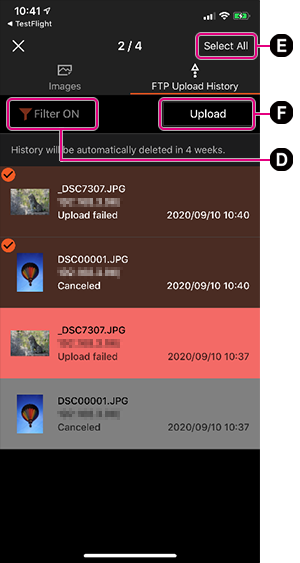
D: [Filter ON/OFF]: When [Filter ON] is selected, you can choose among three options: display only images for which upload was canceled, display only images for which upload failed, or display images for which upload either was canceled or failed. The affected images have the same transmission destination and are marked as either upload canceled or upload failed in the last upload history data that was transmitted.
E: [Select All]: Selects all the displayed images (up to 500 images).
F: Uploads the selected images.