|
Import images you have shot (iPhoto/iMovie) |
|
|
|
About importing of 3D movies
MP4 files (side by side method) can be imported as 3D data. MVC files are imported as 2D data (movie for left eye).
| Notes |
| When importing AVCHD movies as "iMovie" or "Final Cut Pro" |
| ※ |
The AVCHD encoding method of the 2011 model or later is different from those of models released before 2010.
By updating the Mac OS to the most recent version (10.6.7 or higher), importing is possible. |
| ※ |
Cannot import 1080/60p(50p), 1080/24p movies. |
| ※ | When using Cyber-shot, select [LUN Settings] > [Single]. |
|
|
| Import images you have shot (iMovie) |
| |
| 1. |
Turn on the computer.
(When using laptops, to avoid the power from switching off during image import, be sure it is being charged with an AC adaptor.) |

|
| 2. |
When importing movies recorded on a memory card, insert a memory card into the camcorder. |
|
| 3. |
Connect the camcorder and the wall outlet (wall socket) with the AC Adaptor.Turn on the camera. |

|
| 4. |
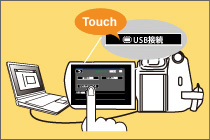
Connect the camcorder to the computer using the USB cable.
(After the connection, the [USB SELECT] screen appears on the camera automatically.At this point, selection of [USB Connect] on the camera LCD screen may be necessary.) |
|
| 5. |
"Connecting" is displayed on the camera LCD and a [NO NAME] or [Untitled] icon will be displayed on the desktop. |
 
|
| 6. |
Start iMovie. |
|
| 7. |
Click the [Open Camera Import window] button at the left side of the window. A device where the images are stored is shown as "Import From:".
The device may appear automatically without clicking the [Open Camera Import window] button.
【When importing all the movies】
(1) Click [Automatic].
(2) Click [Import All...].
【When importing selected movies】
(1) Click [Manual].
(2) Click and check the boxes under the movies you want to import.
(3) Click [Import Checked...].
|
|
| 8. |
Select the location to save, input an event name in [Create new Event], and click [Import]. |
|
| 9. |
Import of movies starts. When the [Import complete] message appears, click [OK]. |
 |
| 10. |
Movie import is complete.
|
|
| |
※ For editing, refer to [Help] > [iMovie Help].
※ When disconnecting the USB cable, drag the [Untitled] or [NO NAME] icon to the [Trash] icon or turn off the computer, then disconnect the USB cable.
|
 |
|
| |
| Notes |
| ※ |
Functions such as "One Touch Disc Burn" cannot be used with Mac OS. |
| ※ |
If you cannot import movies, update all the software and OS, and try again. |
| ※ |
AVCHD and MPEG2 movies are supported by iMovie '08 or later. |
|
|
|
| Import images you have shot (iPhoto) |
| |
| |
| Notes |
| ※ |
Cannot import AVCHD movies. |
|
|
| |
| 1. |
Turn on the computer.
(When using laptops, to avoid the power from switching off during image import, be sure it is being charged with an AC adaptor.) |
|
| 2. |
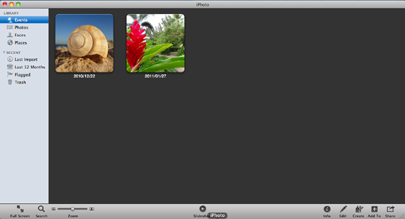
Start iPhoto. |
|
| 3. |
When importing movies recorded on a memory card, insert a memory card into the camcorder. |
|
| 4. |
Connect the camcorder and the wall outlet (wall socket) with the AC Adaptor. |
|
| 5. |
Connect the camcorder to the computer using the USB cable.
(After the connection, the [USB SELECT] screen appears on the camera automatically.At this point, selection of [USB Connect] on the camera LCD screen may be necessary.) |
|
| 6. |
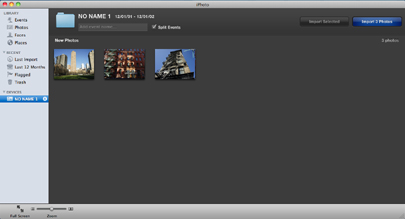
"Connecting" is displayed on the camera LCD and the connected camera is displayed in [Device] of the iPhoto screen then a list of images within the camera is displayed.
When selecting which images to import, select a image and click [Import Selected Photo].
When importing all images in the camera, click "Import XX photos". |
|
|
|
|
|