Streaming live video on USTREAM
- FDR-X1000V / FDR-X3000
- HDR-AS50 / HDR-AS100V / HDR-AS200V / HDR-AS300 / HDR-AZ1
1. Checking the system software version (For HDR-AS100V only)
To use this app on the HDR-AS100V, the system software version of the camera must be the latest version.
[How to verify the system software version of HDR-AS100V]

Turn off the camera, then press the [NEXT] button several times and confirm that [LIVE] appears between [INTVL] and [VMODE].
* If [LIVE] is not displayed on the camera's display panel, update the system software version from <here>.
※ For the tethering settings of your smartphone or the Wi-Fi network settings of your router, refer to the instructions manual of your smartphone or your Wi-Fi router. For more details about the Wi-Fi network environment, consult each network service provider.
3. Transferring settings on "Network Setting Tool" to your camera
Maintain internet connection of the PC from the start to finish of the setting procedure.
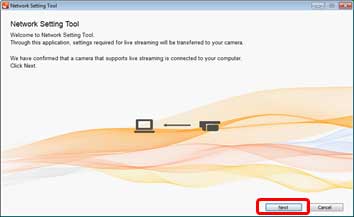
Procedure 1. Connect the camera and PC and start the Network Setting Tool
- Turn on the camera, and connect the PC and the camera with the supplied USB cable.
If the USB connection between the PC and the camera cannot be detected, a message that states that the camera could not be detected is displayed on the PC. Try the following.
- Disconnect the USB cable and reconnect it.
- If there are several USB terminals on the PC, try connecting the USB cable to a different USB terminal.
- Confirm that the icon
 (removable disk) or
  (removable disk) is displayed on the task tray located on the bottom right corner of the PC screen. Depending on the condition, the icon may not appear.
- Activates Network Setting Tool from Action Cam Movie Creator - [
 Camera settings] - [Camera Settings for Live Streaming].
- Do not turn off the camera until network setting is complete.
- Be careful not to remove the battery or allow accidental disconnection of the USB cable during the setting procedure.
- Click [Next].
If a message that states that a compatible camera has not been connected appears, refer to the following possibilities.
- There is connection error between the camera and PC.
- The camera power is off.
- The camera is not a compatible model.
- The system software of HDR-AS100V is not up to date.
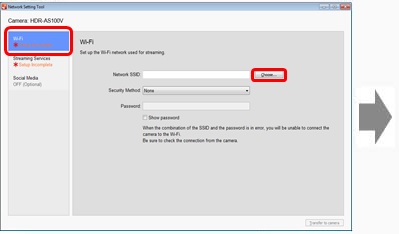
Procedure 2. Network Setting
Select the Wi-Fi the camera is to connect to.
- Click [Wi-Fi] on the left side of the "Network Setting Tool" screen.
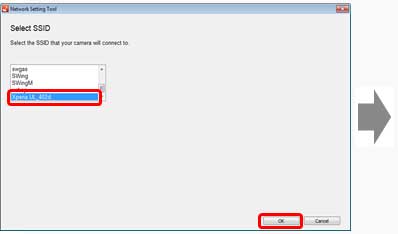
Turn on the Wi-Fi connection setting of the PC and click [Choose] while the device to be connected (smartphone tethering function or Wi-Fi router) to the camera is in operation. Select the SSID to connect to from the list of network SSIDs recognized by the PC, click [OK] and enter the [Password].
You can also directly enter the [Network name], [Security Method], and [Password].
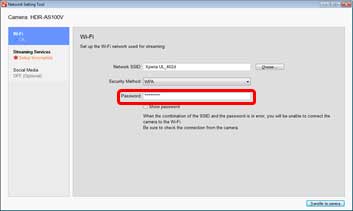
For the tethering settings of your smartphone or the Wi-Fi network settings of your router, refer to the instructions manual of your smartphone or your Wi-Fi router. For more details about the Wi-Fi network environment, consult each network service provider.
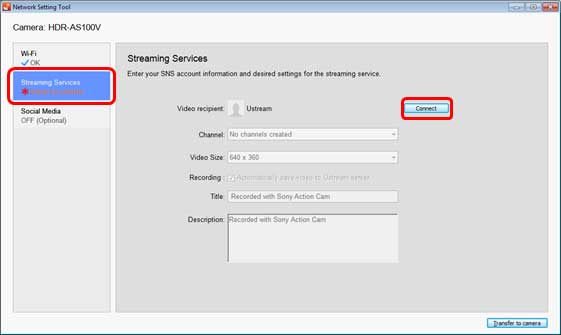
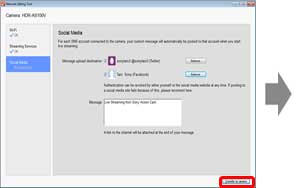
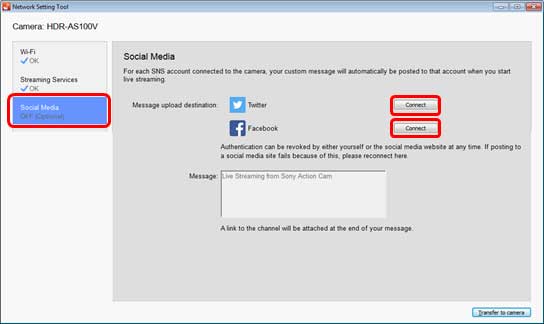
Procedure 3. Streaming Services
Enter your account and perform settings related to the streaming service.
- Click [Streaming Services] on the left side of the "Network Setting Tool" screen and click [Connect] to set the account information of the video streaming service (USTREAM).
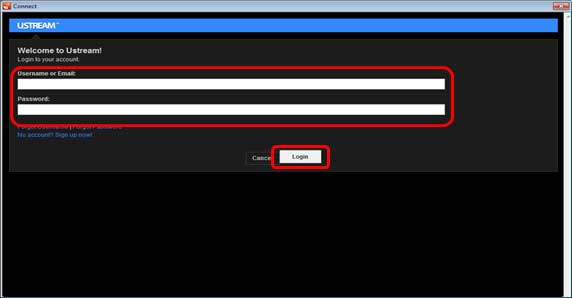
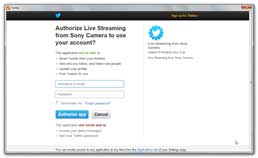
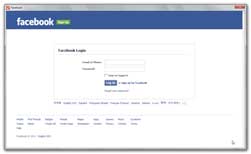
- The [Connect] screen is displayed on a separate screen. If you already have an account on the video streaming service (USTREAM), enter your [User Name or Email] and [Password] to login. Follow the on-screen instructions for the following.
To register new users from this screen, click [Register New Account] and follow the instructions displayed on the screen. After the registration procedure is complete, close the [Connect] screen. Click [Connect] in the "Network Setting Tool" screen, then follow the instructions displayed on the screen.
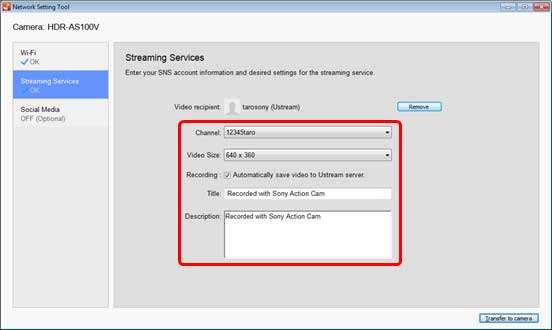
- Set [Channel], [Video Size] on the "Network Setting Tool" screen. If you have selected save in [Recording], you must enter the [Title] and [Description].
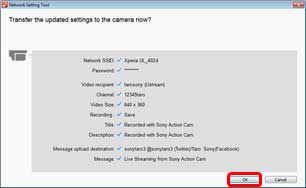
Procedure 5. Transfer Network Settings to Your Camera
Confirm your setting contents and transfer to your camera.
- If you click [Transfer to camera] on the bottom right side of the "Network Setting Tool" screen, the screen that has been set will be displayed. Confirm its contents and click [OK].
- When the transfer is complete, click [OK] and close the "Network Setting Tool" screen. The setting procedure is complete. Disconnect your camera from the PC. If you are streaming live video for the first time, it is recommended that you perform a trial stream in a stream ready environment beforehand.
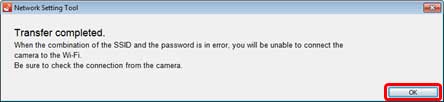
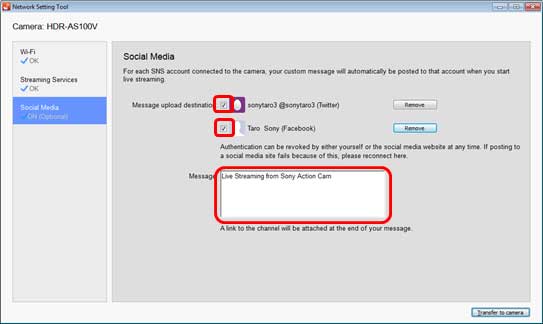
With this setting, your personal information (login information for USTREAM, Twitter, Facebook accounts) will be set on your camera. If you plan to hand over or dispose your camera, be sure to perform the resetting operation on your camera.
4. Streaming live video on USTREAM
For the How-to video for performing live streams with a camera, see <here>. HDR-AS100V is used in the instructions on this video.
HDR-AZ1 : Refer to <here> for details.
HDR-AS200V/FDR-X1000V : Refer to <here> for details.
FDR-X3000/HDR-AS300/HDR-AS50 : Refer to <here> for details.
Confirm that the date and time of the camera are set correctly before starting your stream.

 PAGE TOP