|
| Click on one of the files below (LA-EA1V2_Update1010a.exe) to begin download. Please save the downloaded file onto the Desktop of your computer (recommended). |
|||
|
|||
Double-click [LA-EA1V2_Update1011a.exe] to start up Firmware Updater (Figure 2).![Double-click [LA-EA1V2_Update1010a.exe] to start up Firmware Updater.](../../images/download/la-ea1_je3e/la-ea1_img02.jpg) (Figure 2) |
Remove the memory card from the camera before following the procedure below.
|
|
||||||||||||||||||||||||
|
||||||||||||
|
||||||||||||||||||||||||
|
||||||||||||
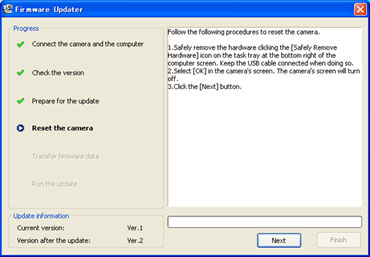
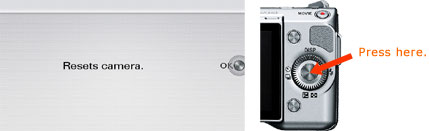
When the upgrade is completed, the screen on Figure 14 appears.
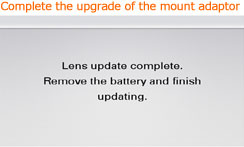 (Figure 14) |
||||||||||||
| Follow the instruction below to confirm the firmware version is Ver.02. Select [Menu] - [Setup] - [Version] on the camera. The firmware version is displayed (Figure 15). 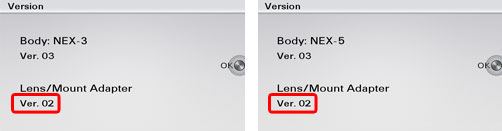 (Figure 15) |
![According to the instruction on Firmware Updater, select [Menu] - [Setup] - [USB Connection] on the camera, and check if [Mass Storage] is selected.](../../images/download/la-ea1_je3e/la-ea1_img03.jpg)
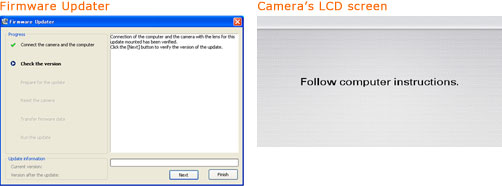
![After confirming the screens on Figures 4 and 5, click [Next].](../../images/download/la-ea1_je3e/la-ea1_img05.jpg)
![Click [Run] to transfer the upgrade firmware.](../../images/download/la-ea1_je3e/la-ea1_img08.jpg)
![When the transfer is completed, Click [Finish] and disconnect the USB cable.](../../images/download/la-ea1_je3e/la-ea1_img09.jpg)