Saving videos in a Playlist (Playlist Disc Creation)

Creating a disc from the Playlist on your camcorder (Playlist Disc Creation)
You can save videos listed in a Playlist on your camcorder on a disc using [Playlist Disc Creation] in the Handycam Utility.
 Notes
Notes
- Player for AVCHD or equipment that is compatible with the AVCHD format is needed to play back AVCHD format discs you have created with videos included in a HD Playlist.
- AVCHD format discs cannot be played back with a DVD player or DVD recorder since DVD players and DVD recorders are not compatible with the AVCHD format.
- Do not insert AVCHD format discs into a DVD player or DVD recorder. AVCHD format discs may not be ejected properly from a DVD player or a DVD recorder.
- You cannot create a Blu-ray Disc using this function.
-
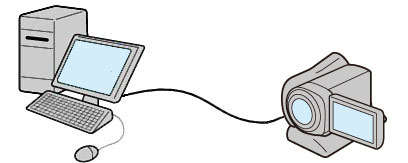
Turn on your camcorder, and connect it to the computer using the USB cable.
Use the AC Adaptor as the power source.
For how to connect your camcorder to a computer, refer to the Operating Guide supplied with your camcorder.
The [USB SELECT] screen is displayed on the LCD screen of your camcorder. -
Select [
 USB CONNECT] or [
 USB CONNECT] on the LCD screen of your camcorder.
The [Handycam Utility] window is displayed on the screen of the computer.
USB CONNECT] on the LCD screen of your camcorder.
The [Handycam Utility] window is displayed on the screen of the computer. - Click [Playlist Disc Creation] in the [Handycam Utility] window.
The [Create discs from a Playlist] window is displayed.
-
Click [HD Playlist] or [SD Playlist].
When you select [HD Playlist], an AVCHD format disc is created.
When you select [SD Playlist], a DVD video with standard definition image quality (SD) is created.
-
Click [Start].
Scenes of videos listed in a Playlist on your camcorder are displayed as thumbnail images.
-
Confirm the videos to write to a disc.
Videos with checkmarks at the top right are written on the disc in the Playlist order.
-
Click [Next].
Image of the AVCHD or DVD-Video menu to create is displayed.
 Hints
Hints- When you create an AVCHD format disc, selecting [Each Date Taken] automatically changes the order of videos into the order of the date on which they were taken.
- When you create a DVD video with standard definition image quality (SD), selecting [Menu Sorted by Date Taken] automatically changes the order of videos and still images into the order of the date on which they were taken.
- Clicking [Font] lets you select the text color of the disc name and title, etc.
- When you create a DVD video with standard definition image quality (SD), clicking [Preview] lets you check the completed image of the DVD video.
- When you create a DVD video with standard definition image quality (SD), clicking [Settings] lets you set video quality, display time for each still image in slide show, and the various operations that take place upon the first play of a disc.
-
Confirm the menu style to be created, and click [Start].
Disc creation begins.
 Notes
Notes- Creating a disc may take some time.
- You cannot use an 8 cm disc with the DVD drive of a computer.
Hint- You can choose to create more copies of the same disc after writing to the disc is completed.
|
Copyright 2009 Sony Corporation
|
P0321-01-US
|