Global
Support / Contact Us
Support / Contact Us
ILCE-1
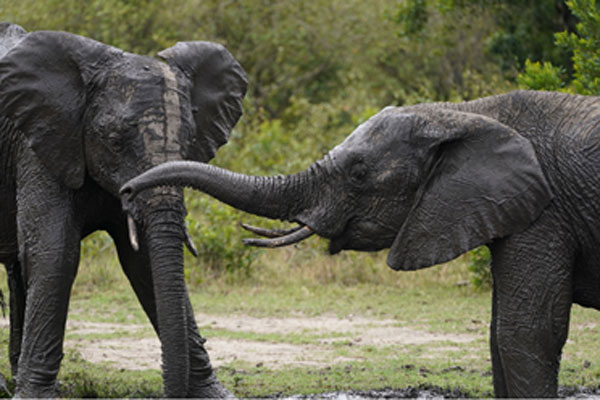
The procedure for shooting by focusing on the eyes of an animal or bird is introduced below.
There are two shooting methods. Use either method in accordance with the shooting conditions. (The eyes of an animal or bird can be detected only when shooting still images.)

1. When shooting images by pressing the shutter button halfway down (or pressing the AF-ON (AF On) button)
Main usages
 Focus Area] in case detecting an eye is difficult.
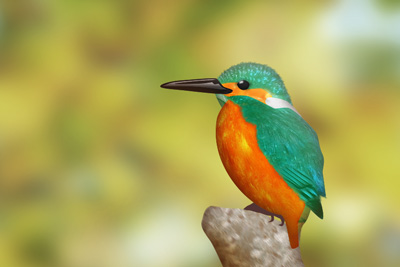
2. When shooting images by assigning [Eye AF] to a custom key
Main usages
Focus Area]. (Focus) → [Face/Eye AF] → [Face/Eye Prior. in AF] → [On] (Focus) → [Face/Eye AF] → [Face/Eye Subject] → [Animal] or [Bird] (Focus) → [Focus Area] → [Focus Area] → desired setting.
If you want to detect an animal’s eye from the widest range, set [Focus Area] to [Wide] since the camera focuses on the eye positioned within the focus area.
If you want to limit the range for detecting an eye, set [Focus Area] to [Spot] or [Zone].
When [Focus Area] is set to [Zone]
* You can also use the custom key function to focus on an eye by pressing the custom key to which you have assigned [AF On].

Hint
Focus Area] to [Spot] to make it easier to detect and focus on a specific eye. Note
The camera may not be able to detect an eye depending on the subject or shooting environment. For details, refer to the section “About Eye Detection.”
If you set [Face/Eye AF] to focus on eyes beforehand, a focusing frame will automatically appear around any detected eye while tracking a subject.
The procedure for setting the focusing on the eye in the condition where [Face/Eye Subject] is set to [Animal] is provided below.
* When [Face/Eye Subject] is set to [Bird], you cannot switch the eye to be detected.
To set the eye (left or right) to be detected in advance, select MENU → (Focus) → [Face/Eye AF] → [Right/Left Eye Select]. You can also switch the eye to be detected in the following operation.
Switching with a custom key assigned to [Switch Right/Left Eye]
* [Switch Right/Left Eye] operations are possible when you are not pressing the shutter button halfway down.
When [Right/Left Eye Select] is set to [Right Eye] or [Left Eye], you can switch the eye to be detected every time you press the custom key to which you have assigned the [Switch Right/Left Eye] function.
When [Right/Left Eye Select] is set to [Auto], you can temporarily switch the eye to be detected by pressing the custom key to which you have assigned the [Switch Right/Left Eye] function.
Note
When [Right/Left Eye Select] is set to [Auto], the temporary left/right selection is cancelled if you perform the following operations, and the camera returns to automatic eye detection mode.
Switching by touch
You can switch the eye to be detected by setting [Touch Func. in Shooting] to [Touch Tracking] in advance and touching around the eye on the monitor.
Touch the periphery of an eye that you want detected on the monitor.
The eye to be detected switches.
Switching by touch is possible when you are not pressing the shutter button halfway.
To cancel touch operations, press the center of the control wheel or touch the ![]() icon in the upper right of the monitor.
icon in the upper right of the monitor.
 (Setup) → [Operation Customize]→ [
 Custom Key/Dial Set.], select a button to which you want to assign the function, and then set [Eye AF]. (Focus) → [Face/Eye AF] → [Face/Eye Subject] → [Animal] or [Bird]
Note
The camera may not be able to detect an eye depending on the subject or shooting environment. For details, refer to the section “About Eye Detection.”
Even when the subjects have cat-, dog-, or bird-like faces, the camera may not be able to detect an eye depending on the shooting environment such as the type of animal or bird, the direction of its face, and the conditions of the scene (e.g. two or more animals or birds moving around).
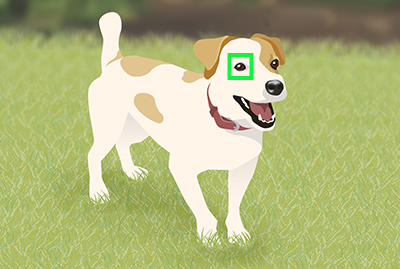
When [Face/Eye Subject] is set to [Animal]
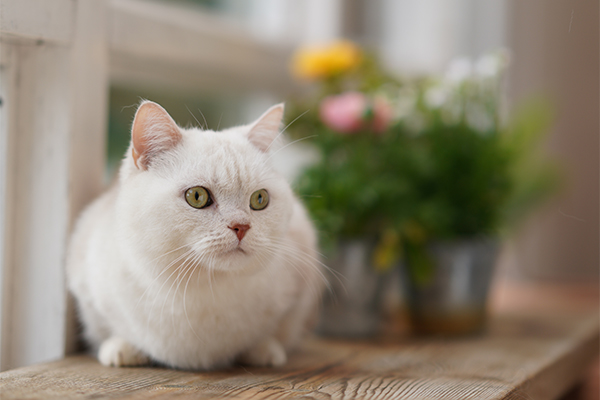
Cat-like face
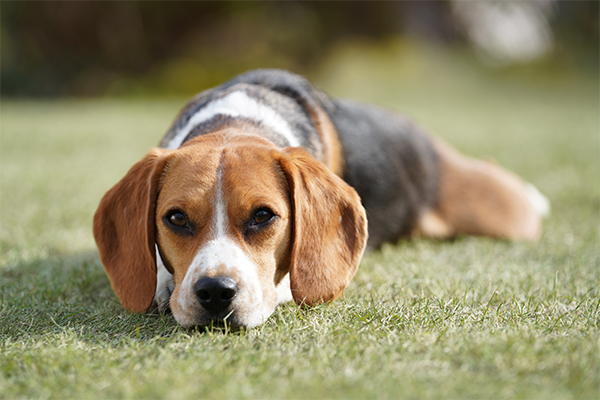
Dog-like face

Size and direction of a subject where its entire face such as an eye or nose is seen properly
(Example:Face shown in front view)
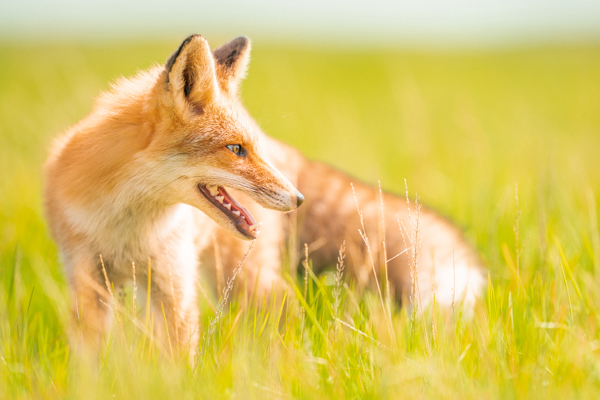
Size and direction of a subject where its entire face such as an eye or nose is seen properly
(Example: Face shown sideways)
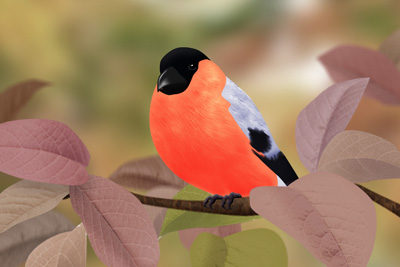
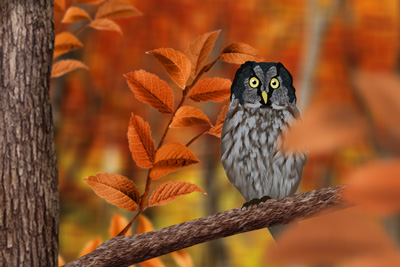
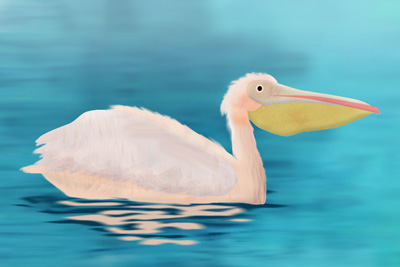
When [Face/Eye Subject] is set to [Bird]
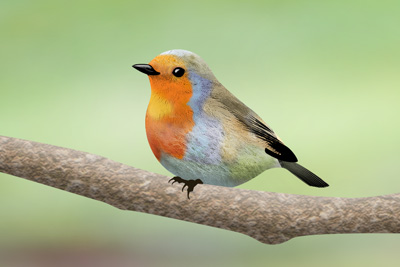
Face like that of small birds
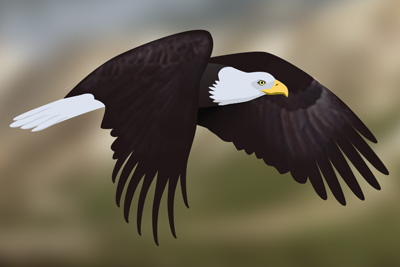
Face like that of eagles or hawks
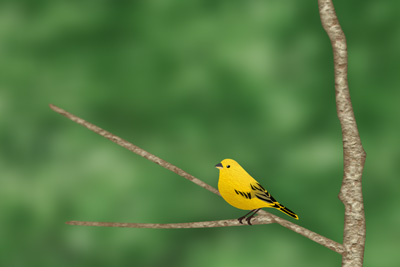
Entire face of the subject is seen properly and it is not too small
Direction of face where the shape of an eye and beak is seen properly
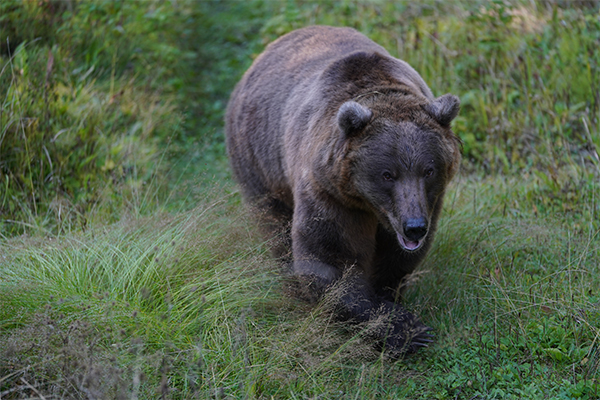
When [Face/Eye Subject] is set to [Animal]
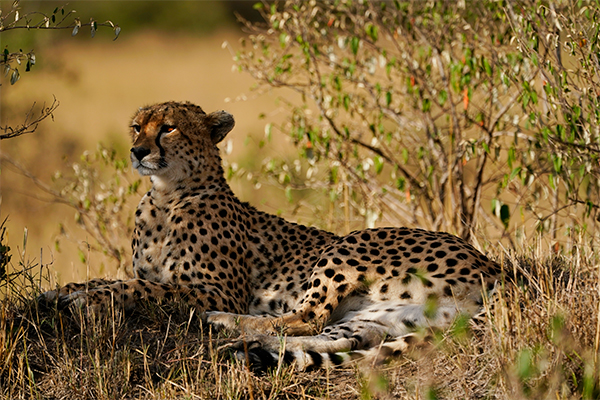
The subject animal has a spotted or striped face and body
When shooting in dark places or animals with dark hair
Animals that do not have cat- or dog-like faces

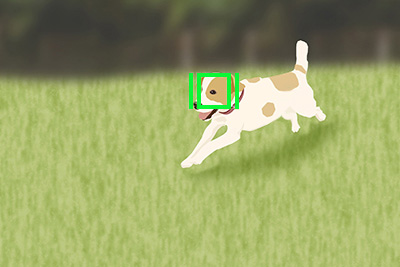
When two or more animals are moving around
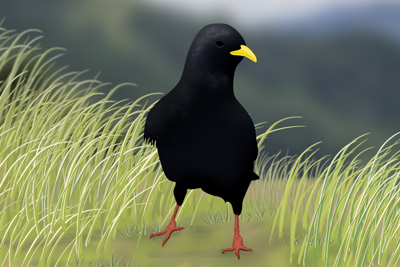
When [Face/Eye Subject] is set to [Bird]
Cases where an eye or body outline of bird is not sharp
(Example: Patterns of body feathers make it difficult to identify eyes)
Cases where an eye or body outline of bird is not sharp
(Example: Dark environment, black body feathers)
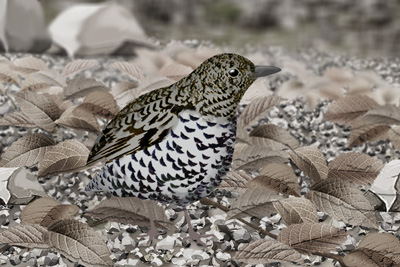
Cases where an eye or body outline of bird is not sharp
(Example: Colors or patterns of body feathers that are similar to the background)
Birds with a face not like those of small birds or eagles/hawks
(Example: Eye shown in front)
Birds with a face not like those of small birds or eagles/hawks
(Example: Birds with long neck and big beak)
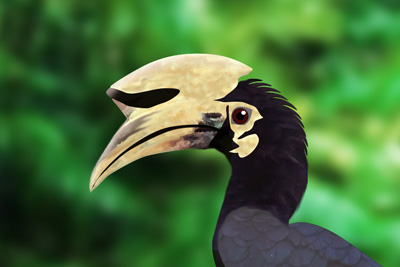
Birds with a face not like those of small birds or eagles/hawks
(Example: Birds with complicated ornamental feathers or comb on the head)

Scene where many birds have flocked together
Hint
 PAGE TOP