How to clean and check for dust attached to the image sensor
When attaching and detaching the lens, dust may get inside the camera and get attached to the image sensor. The attached dust may appear on the shooting images and if not removed, the dust will continue to appear on the same area of all your images.
We will explain the checking method for whether or not there is dust attached to the image sensor and how to clean it.
How to check for dust attached to the image sensor
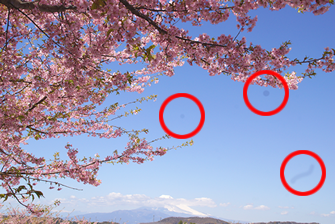
To check if there is dust attached to the image sensor, shoot an image of a white wall or paper, or of a cloudless sky.
- Set the mode dial to A (Aperture Priority).
- Set the Aperture (F number) to approximately [F11] and take several shots of a white wall or paper, or of a cloudless sky.
- After shooting, check the image on the camera's LCD screen.
If there is dust attached, dark spots will appear on all photos in the same area.
- If dust appears on the same area, perform cleaning of the image sensor with the following method.
How to clean the image sensor
Cleaning environment
When cleaning, it is recommended to perform procedures in an indoor environment where there is no wind or dust.
What to prepare
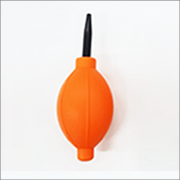
Commercial camera blower*
Used to blow off dust from the body and the inside of the camera.
* Do not use a spray type blower.
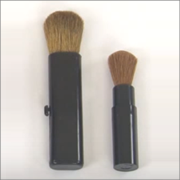
Commercial camera brush
Used to brush off dust from the body and lens of the camera. It is recommended to use both large and small brushes for cleaning lens.
STEP 1 Cleaning the image sensor (Sensor Cleaning)
Perform cleaning using the Cleaning Mode function equipped on the camera.
Notes :
Cleaning can be performed only when the battery level is  (3 remaining battery icons) or more.
STEP 2 Check to see if dust has been sifted out.
You can recheck if dust appears with " How to check for dust attached to the image sensor ".
Cleaning of the image sensor is complete when there is no more dust in the image.
If there is no improvement, proceed to the next step.
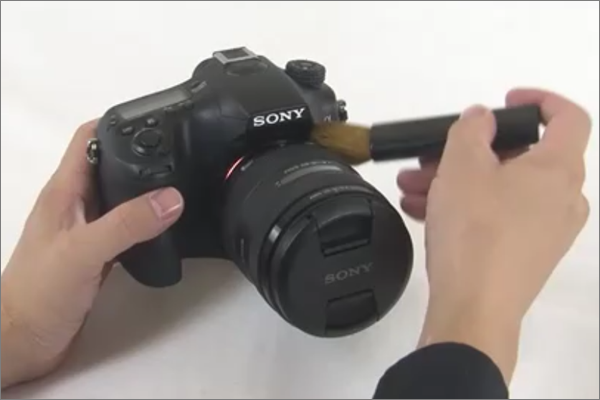
STEP 3 Clean the periphery of the lens
Remove the dust from the periphery of the lens before cleaning.
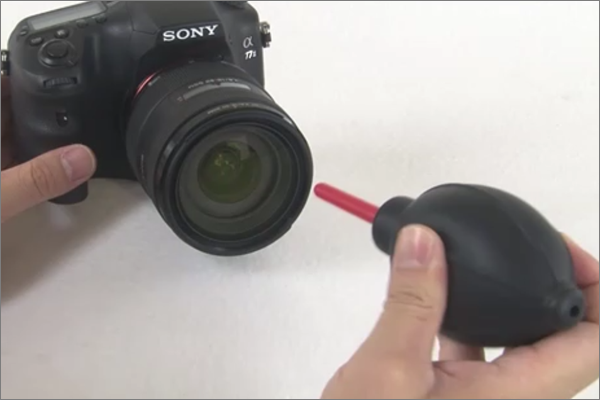
- Lightly remove the dust on the entire camera body with a brush.
- Blow off dust from the delicate parts of the camera using a blower.
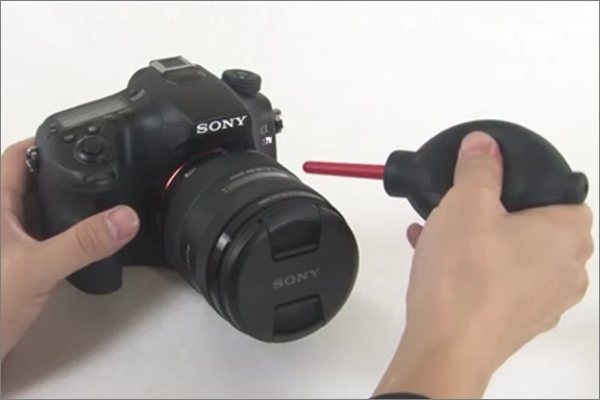
- Remove the lens front cap and blow off dust on the surface of the lens using a blower.
- Attach the lens front cap to prevent dust from getting attached to the lens.
STEP 4 Clean using a blower
Notes :
- Do not subject the product to any shock during cleaning.
- If you scratch the image sensor, you will have to pay for repairs, so it is advised that cleaning be performed with care.
Detach the lens and clean the image sensor.
Procedures may vary depending on the camera model. Select your camera model.
Clean using a blower (E-mount cameras)
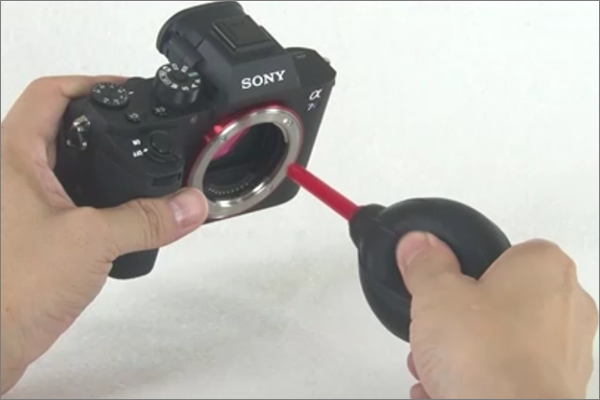
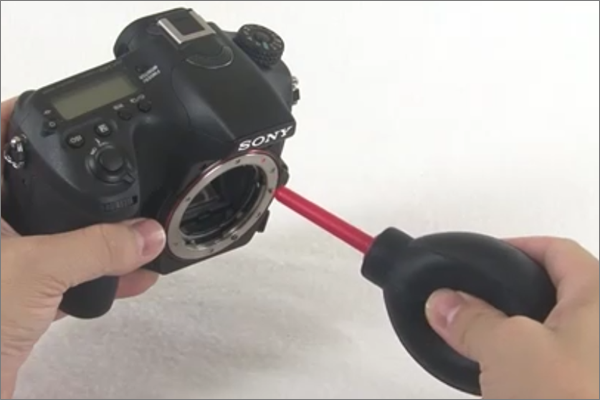
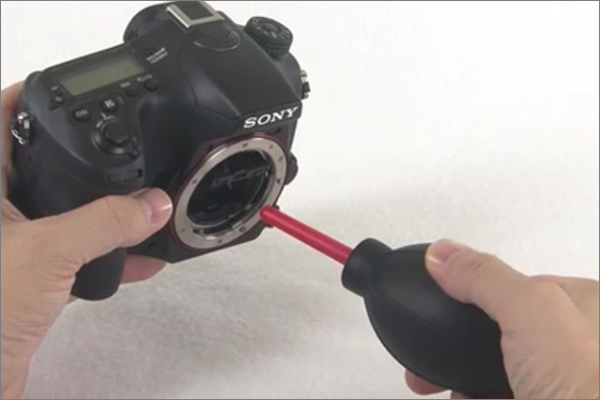
- Turn off the camera power.
Detach the lens. Use the blower to clean the image sensor surface and the surrounding area.
Perform cleaning with the front side of the camera tilted slightly downwards so it will be easier for the dust to be removed.
Notes :
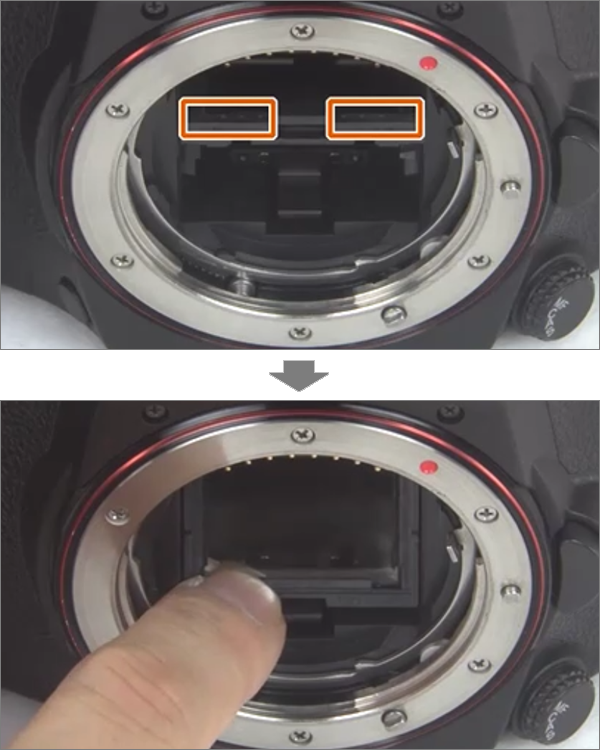
- Be careful not to touch the image sensor surface.
- Do not put the tip of a blower into the cavity beyond the lens mount area, so that the tip of the blower does not touch the image sensor.
- Attach the lens to the camera.
- You can recheck if dust appears with " How to check for dust attached to the image sensor ".
Releasing the shutter several times may drop the dust. In this case, perform cleaning using the blower again.
If the condition does not improve even after cleaning :
If dust is not removed even after cleaning with this procedure, please contact Sony's < Service Centre >.
Clean using a blower (A-mount cameras)
ILCA-99M2
- Turn off the camera power.
Detach the lens. Use the blower to clean the image sensor surface and the surrounding area.
Perform cleaning with the front side of the camera tilted slightly downwards so it will be easier for the dust to be removed.
Notes :
- Be careful not to touch the image sensor surface.
- Do not put the tip of a blower into the cavity beyond the lens mount area, so that the tip of the blower does not touch the image sensor.
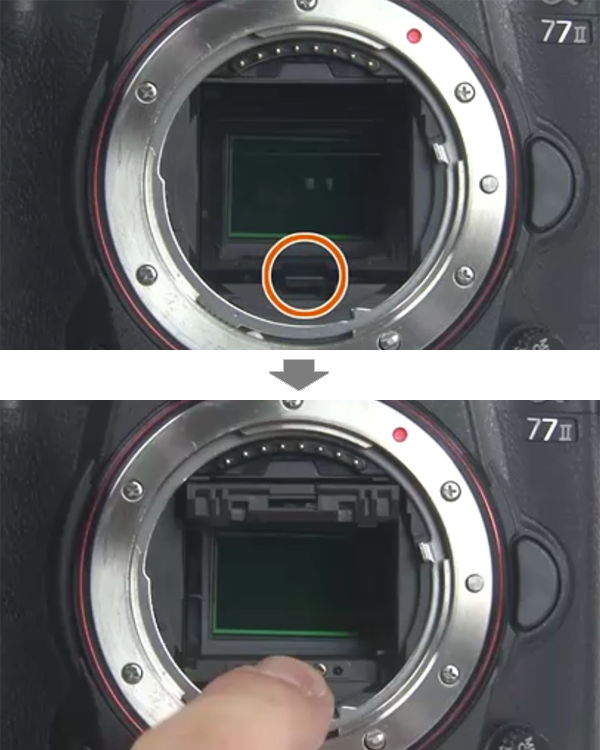
- Press down on the mirror lock lever with your fingers and pop up the mirror.
- Tilt the front side of the camera downwards so it will be easier for the dust to be removed then blow the dust off with a blower.
Notes :
- Be careful not to touch the image sensor surface.
- Do not put the tip of a blower into the cavity beyond the lens mount area, so that the tip of the blower does not touch the image sensor.
- After cleaning, press down on the mirror frame portion until you hear a click.
Notes :
- Be careful not to touch the lens contacts and mirror surface.
- When you attach the lens after you finish cleaning the image sensor, confirm that the mirror has been completely pushed down. Otherwise, it may damage the lens or lead to a malfunction. Also, if the mirror has not been pushed down completely, the autofocus system will not be able to achieve proper focus.
- Attach the lens to the camera.
- You can recheck if dust appears with " How to check for dust attached to the image sensor ".
Releasing the shutter several times may drop the dust. In this case, perform cleaning using the blower again.
If the condition does not improve even after cleaning :
If dust is not removed even after cleaning with this procedure, please contact Sony's < Service Centre >.

 E-mount cameras
 PAGE TOP