If there are videos and photos you have designated to be uploaded to sharing services on your camera, when it is connected to your Mac, “Share-it-Later for Bloggie” starts and you can upload these videos and photos to sharing services.
-
Turn on your camera, and connect it to your Mac.
If there are videos and photos you have designated to be uploaded to sharing services on your camera, the “Share-it-Later for Bloggie” dialog box will be displayed automatically.- By clicking [Settings], you can select the sharing service to which you want to upload videos and photos using “Share-it-Later for Bloggie.”
-
Click [Upload].
The upload window is displayed.
-
Follow the instructions on the upload window, and upload the videos or photos.
 Hints
Hints
- If the file size exceeds the upper limit, you can upload it in a compressed format.
- If you upload videos and photos to “PlayMemories Online,” you can send e-mails to members who share the same album when you upload videos and photos. For details on albums, etc., refer to the “PlayMemories Online” website.
Notes
- Videos with high definition image quality (HD) may not be able to be uploaded, depending on the sharing service.
- You need to have your personal account created in advance through the website of the sharing service.
- Appearance of the screen and their functions are different depending on the sharing service you use.
- Type of media files (videos/photos) are different depending on the sharing service you use.
- You need to enter the account name and password that you obtained from the website of the sharing service into login information. When they are saved, it is not necessary.
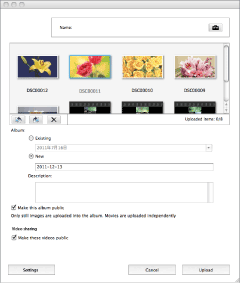
Parts and controls of the upload window
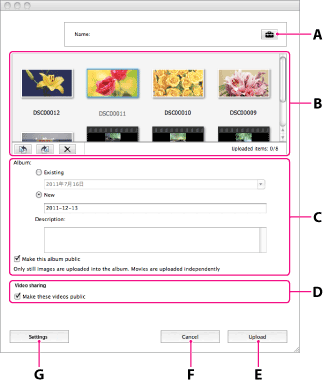
| A |  |
Click to log into sharing services. |
| B | Thumbnail list | Displays thumbnails of videos and photos to be uploaded. Click  or or  to rotate the videos and photos. to rotate the videos and photos.Click  to remove a video or photo from the videos and photos to be uploaded. to remove a video or photo from the videos and photos to be uploaded.Double-click thumbnails to add comments to the videos and photos, or to adjust the length of the videos to be uploaded. |
| C | Album (Only for services supporting the album function) | Select the album where you want to upload videos and photos. Set whether to show the album to the public on the website. |
| D | Video sharing | Set whether to show videos to the public on the website. |
| E | Upload | Click to upload videos and photos to the sharing service. |
| F | Cancel | Cancel upload of videos and photos to the sharing service, and close the upload window. |
| G | Settings | Click to make the appropriate image conversion settings when you upload videos and photos. |
On trademarks
- PlayMemories Online is a trademark of Sony Corporation.
- Mac is a trademark of Apple Inc.