Autofocus
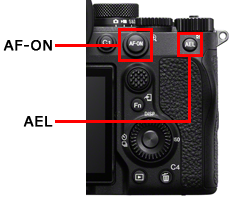
1. How to separate autofocusing from the shutter release (AF On)
You can control autofocusing and the shutter release independently, instead of activating the autofocus function by pressing the shutter button halfway down. Operate the shutter button with your index finger, and the AF-ON button with your thumb.Generally, this method is called "back-button AF," since the autofocus function is activated using a button on the back side of the camera. This method is helpful in the following situations.
- When you want to focus at a specific shooting distance predicting the position of the subject
- When you don’t want to hold the shutter button halfway down for a long period of time
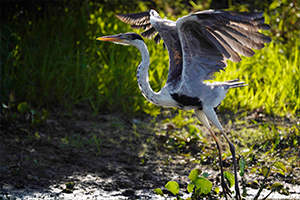
- When you want to prioritize the shutter release timing, such as when shooting a bird taking off
- When you want to control the AF function and the AE function separately
If the subject is moving, set Focus Mode to AF-C (Continuous AF). While the AF-ON button is pressed and held, the camera keeps focusing on the subject continuously. You can release the shutter exactly at your desired timing.
If the subject is static, set Focus Mode to AF-S (Single-shot AF). Once you press the AF-ON button, the focus is locked unless you press it again. You can capture the best shot of the subject with the focus locked.
| Advance preparation |
|
|---|---|
| Shooting | For a moving subject, press and hold the AF-ON button. For a static subject, press the AF-ON button once. |
 (Still) to select the still image shooting mode.
 (Focus) → [AF/MF] → [AF w/ Shutter] → [Off].
 (Setup) → [Operation Customize] → [
2. Instantly switching tracking on or off while using [Spot] ([Reg. Custom Shoot Set])
When you want to switch between different subjects during autofocus, it is recommended that you set the focus area to [Spot]. However, combining it with tracking is useful if you want to shoot freely composed shots of scenes with rapid movement. Assigning the tracking function to an easily accessible button such as the AF-ON button allows for smoother switching between functions.
Pressing the shutter button halfway down enables you to focus with [Spot]. Pressing the AF-ON button starts tracking of the subject.
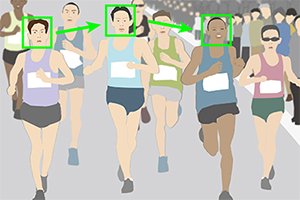
Right after the start of a marathon, when runners are constantly switching places, shoot each runner with [Spot].

At the last stage of the race, use the tracking function with the AF-ON button to shoot a single runner with the desired composition, taking into account the balance between the subject and the background.
| Advance preparation |
|
|---|---|
| Shooting | If there are multiple subjects, shoot using [Spot]. If there is only one subject or if the subject is moving rapidly, press the AF-ON button to start tracking. |
3. Instantly switching between multiple focus-area settings ([Reg. Custom Shoot Set])
The [Reg Cust Shoot Set] (Register Custom Shooting Setting) function is recommended for switching instantly between focus-area settings according to the state of the subject. It is useful under continuously changing shooting conditions, such as sports photography. There are three buttons — the AF-ON button, the AEL button, and the focus hold button on the lens — that can be operated without changing your holding position. You can improve the overall operability of the camera by assigning functions appropriately to these buttons according to the shooting situation.
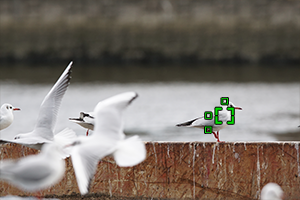
Example of primarily using [Expand Spot], combined with a wide focus area for more versatile use
- [
 Focus Area]: [Expand Spot]
 - AF-ON button: Assign [Tracking: Expand Spot].
- AEL button: Assign [Wide].
A
B
C
This is an example of combining [Expand Spot] with [Wide]. When you aim at a certain bird in the flock, use [Expand Spot] (A). When the target bird is moving, use [Tracking: Expand Spot] with the AF-ON button (B). You can switch the focus area to [Wide] instantly by pressing the AEL button even if flying birds come into the frame suddenly (C).
| Advance preparation |
|
|---|---|
| Shooting | If no button is pressed, [Expand Spot] will be applied. Press the AF-ON button to start tracking with [Tracking: Expand Spot]. Shoot with the AEL button pressed down to use [Wide] focus area.
|
4. Frequently focusing on the same specific position ([AF Area Registration])
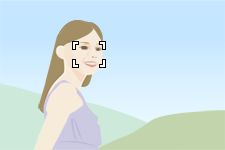
In sports photography or portrait photography, when you shoot images with the same composition frequently, you can move the focusing frame to a specified position instantly by pressing a single button ([AF Area Registration]). If you often focus on the center of the image, [Focus Standard] is recommended.
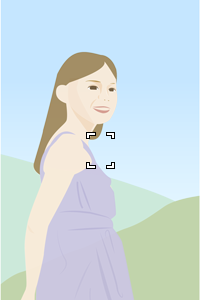
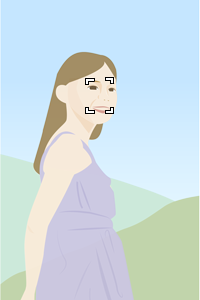
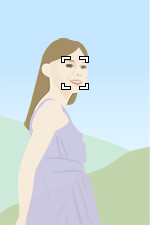
In portrait shooting, set the focusing position to the upper part of the monitor so that you can start shooting quickly.
| Advance preparation |
|
|---|---|
| Shooting | Shoot the image while pressing down the assigned key (or after you press the key). The registered focusing area will flash. |
| Advance preparation |
|
|---|---|
| Shooting | Press the center of the multi-selector. When [Wide] is selected, the camera focuses on the center of the monitor and the focus is locked. When [Spot] is selected, the focusing frame returns to the center. |
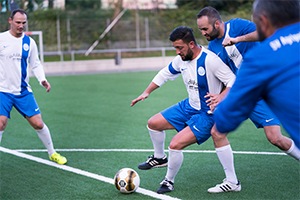
5. Moving the focus area more quickly by using a dial ([My Dial Settings])
Generally, the multi-selector is used when focusing by moving [Spot]. However, using the multi-selector may sometimes cause vertical movement when only lateral movement was intended. In cases like these, you can move [Spot] precisely in only the intended direction by assigning it to a dial. If you frequently adjust the exposure settings and move the focus area using the dials, it is convenient to assign this function to an easily accessible button such as the AEL button.
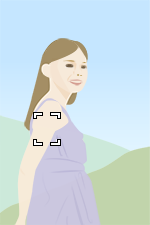
You can quickly move the spot in the intended direction according to the movement of the player.
| Advance preparation |
|
|---|---|
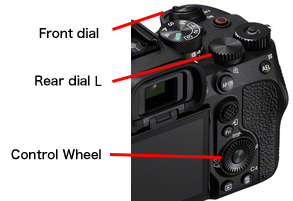
| Shooting | Press the AEL button. Set the shutter speed with  rear dial L, move the focusing frame for [Spot] to the left/right with the rear dial L, move the focusing frame for [Spot] to the left/right with the  front dial, and move it up/down with the control wheel. front dial, and move it up/down with the control wheel. |
 : L] or [Move AF Frame
 : L] or [Move AF Frame
6. Frequently switching the orientation of the camera between vertical and horizontal ([Switch V/H AF Area])
You can choose whether to switch the position of the focusing frame (focus position) and the focus area settings according to the orientation of the camera (vertical/horizontal). If you frequently switch the camera's orientation, [AF Point Only] is recommended. It allows you to quickly switch the settings according to the situation, such as when you switch the camera to the vertical orientation due to the subject approaching.
| Advance preparation |
|
|---|---|
| Shooting |
  You can move the focusing frame to a preset position according to the orientation of the camera (horizontal/vertical). |
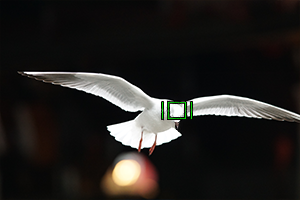
7. Pausing the tracking and face/eye detection functions ([Tracking/Face-Off Hold])
Even if you usually shoot images using the tracking or Face/Eye AF function, you can pause the tracking and face/eye detection functions in the following cases, where you want to switch a subject to another one during shooting or the camera cannot recognize a face because the subject is wearing a helmet.
When the tracking function is paused, the focusing area will be switched to the focusing area where tracking was started. When tracking was started by selecting [Spot], you can specify a subject you want to shoot at the spot you set in the frame indicating the focusing area.
After an intended subject is in focus, you can restart tracking by canceling [Tracking-Off Hold].
| Advance preparation |
|
|---|---|
| Shooting |
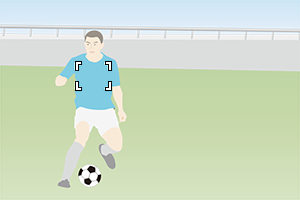
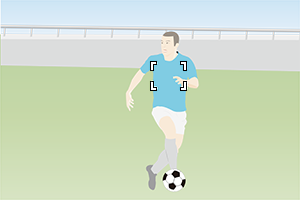
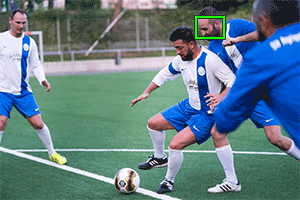 Your intended shooting subject is a player in the center. An example of when the face recognition was switched to another player or when you want to shoot an image of a player in the center during shooting. 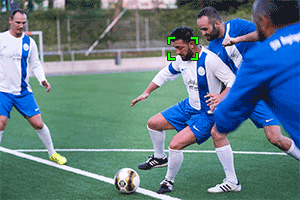 You can press the AEL button to which [Tracking/Face-Off Hold] is assigned in order to focus on a player who is your intended subject in the frame indicating the focusing area setting of [Spot: M].
|
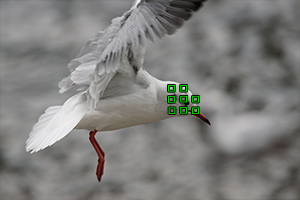
8. Displaying the tracking start area during tracking and making it easy to capture a subject when you start shooting with auto focus again ([Area Disp. dur Tracking])
This function enables you to display the frame indicating the focusing area from where tracking was started, even during tracking. When you want to switch the subject being tracked to another subject, you can capture the new subject quickly since the frame indicating the focusing area is displayed in advance.
| Advance preparation |
|
|---|---|
| Shooting |
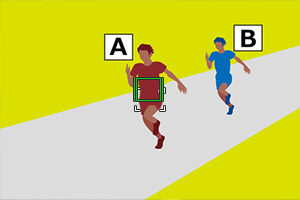 Tracking Subject “A” was started using the tracking function. Both the tracking frame and tracking start area are displayed on Subject “A.”  The tracking frame follows Subject “A,” but the tracking start area remains at the starting position. 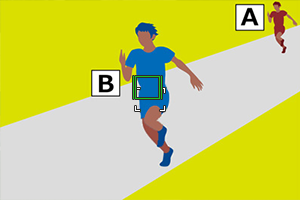 When you want to stop tracking a subject and switch focus from one subject to another, you can capture the new subject quickly since you already know the tracking start area in advance.
|