Global
Support / Contact Us
Support / Contact Us
This utility updates the system software and provides the following benefits:
Model: HDR-AS300
A computer with:
Device power supply:
The device which carried out full charge.
USB cable supplied with the camera:
Follow the instruction below to check the system software version. This update is only for HDR-AS300 cameras that currently have a system software Version 1.00. If your camera system software version is already Version 1.01, this update is not necessary.
Check the system software version
Press the UP button or DOWN button to select [MENU] - [SETUP] - [Ver.], then press the REC/ENTER button.
Note: For Windows 8.1/10 users;
Under the initial settings of Internet Explorer®, the update file will be saved in the [Downloads] folder. Click the [Desktop] tile from the Start screen and find the downloaded file in the [Downloads] folder by using Explorer.
Note:
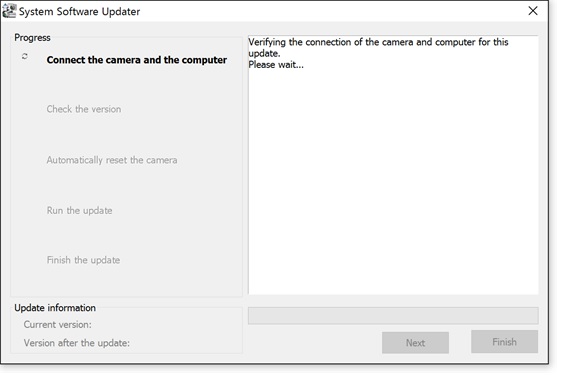
If the computer cannot find the camera, the message “ Could not find the camera for this update.” appears on the computer display. Try the following if this happens.
Note:
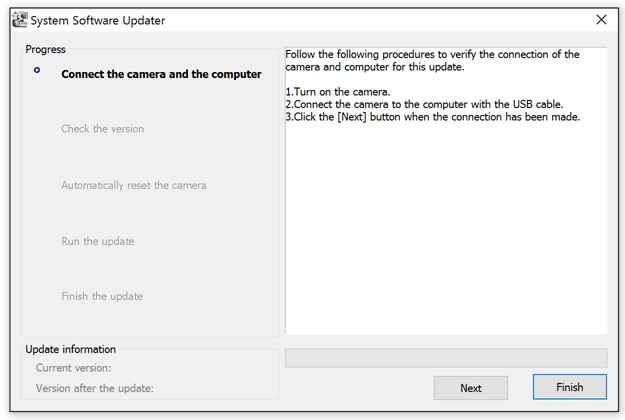
From now on, never turn off the camera until the software update is completed.
Upgrade is required
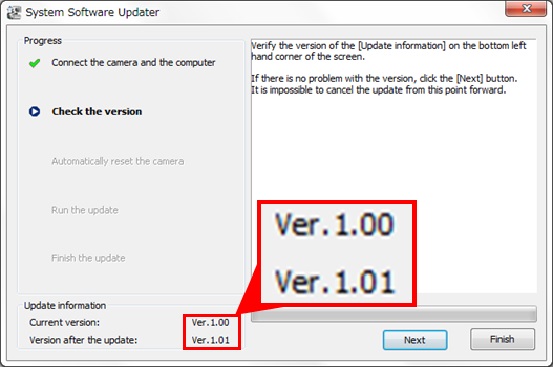
Note:
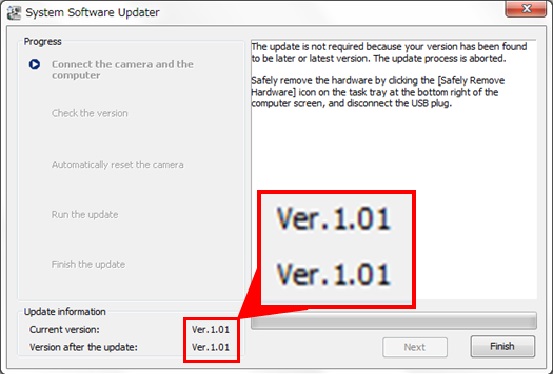
If the below screen appears, the upgrade is not required. According to the message, stop the USB connection and click Finish. Turn off the camera, remove the battery pack, and then turn on the camera again.
Upgrade is not required
The following screen appears.
Note:
Please keep the USB cable connected even after stopping the USB connection on the computer with the above operation.
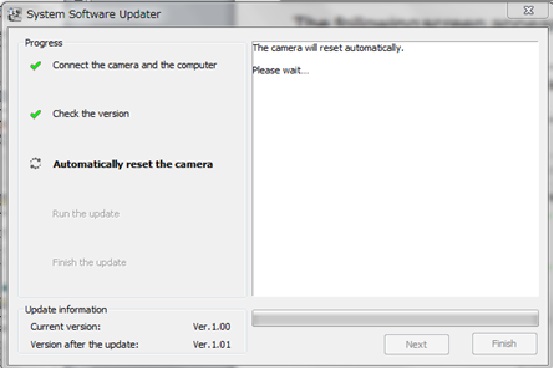
After automatically resetting, the below screen appears and the update starts. The progress bar appears while updating (approximately 15 minutes).
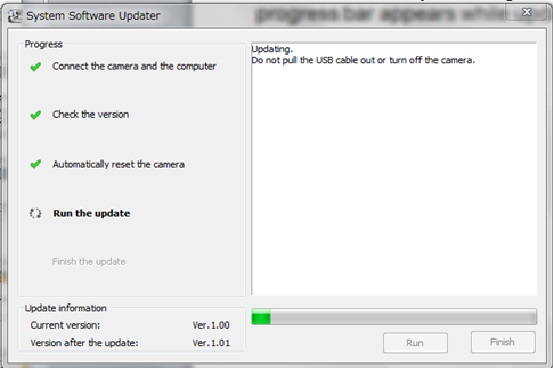
Note:
Never turn off the camera nor disconnect the USB cable while updating.
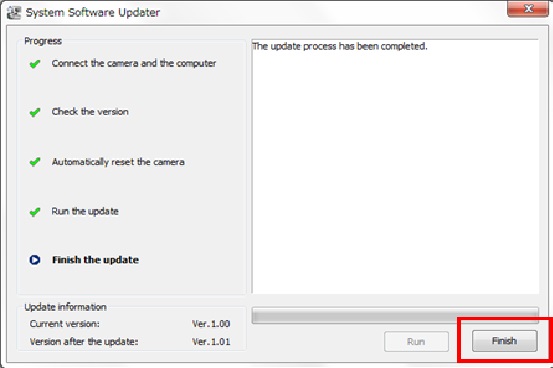
After finishing the update, the PC screen will be changed to the below screen. Also the camera automatically reboots, which may take a few minutes. Please wait until the same screen on the camera LCD appears as one just before starting the software update. When the screen appears, push [Finish] button and disconnect the USB cable.
Press the UP button or DOWN button to select [MENU] - [SETUP] - [Ver.], then press the REC/ENTER button.
 PAGE TOP