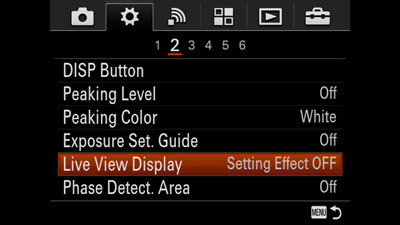
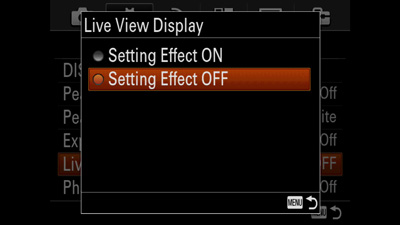
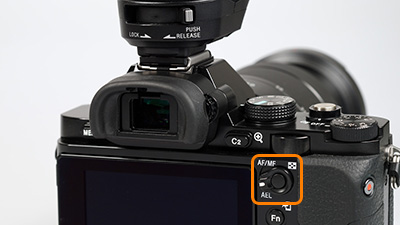
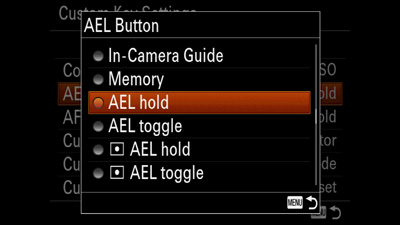
Global
Support / Contact Us
Support / Contact Us
By using an external off-camera flash placed behind the subject, simulating light shining through a window, you can create a much more interesting image than with the direct flash on the camera.


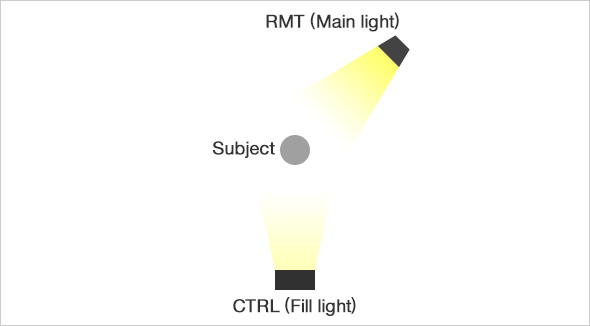
The ratio between the CTRL flash and RMT flashes has been changed from 1:16 to 1:4, 1:2, and 1:1 in this series to obtain the best balance between back and fill light.
Example of lighting
CTRL:RMT (Fill : Main)
1:16

1:4

1:2

1:1

You can try out different lighting ratios to easily check which one suits the subject best. In this case the 1:4 ratio provides the desired result, simulating bright window lighting while still providing the necessary amount of fill light to brighten up the front of the black typewriter.
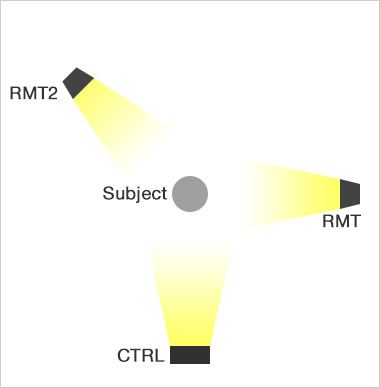
Using Wireless Ratio Flash with 3 groups offers you multiple options for creative lighting. By adding studio accessories such as reflector umbrellas or soft boxes, you can use the Sony flash system as a portable flash solution in any location.


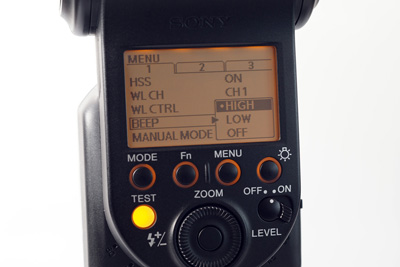
The controller (CTRL) communicates with the off-camera (remote) flashes (RMT) via pulsed light. The amount of light used to control the external flashes is usually insignificant and won't be perceived as fill light even under dim shooting conditions. However, when photographing a strongly reflective subject, or when the subject is behind glass (e.g. a glass cabinet), the CTRL light may be reflected directly onto the lens and will appear in the final image as a bright spot. High Speed Synchronization (HSS mode) is an effective way to avoid this. In this mode, instead of a single flash burst, the flash emits a constant light pulse and the trigger and control signals are timed differently. So, in practice, just set the camera to S or M mode and select a shutter speed faster than the standard flash sync speed (usually 1/160 to 1/250, depending on the camera model). Make sure that HSS mode is enabled for the external flashes as well.
Here are two examples showing the effect:
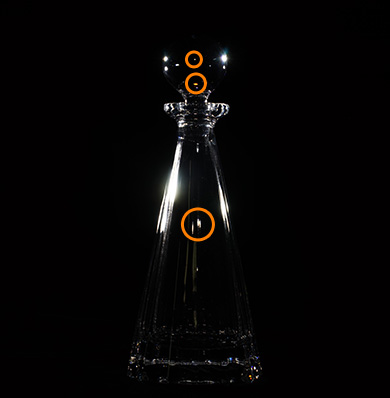
Shot with the standard flash sync speed. The reflections from the CTRL flash appear on the glass.
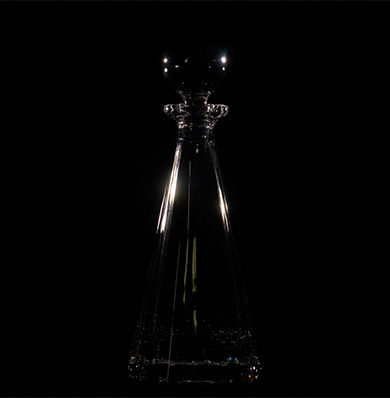
Shot with High Speed Synchronization.
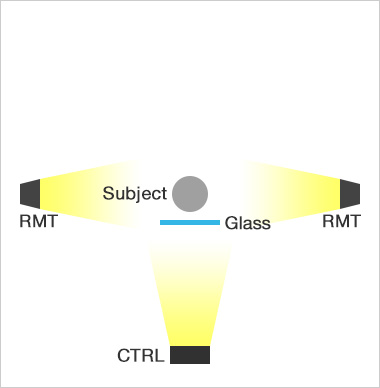
1/250 sec. (Standard flash sync speed)

1/320 sec. (High Speed Synchronization)
In the image to the left, the standard flash sync speed was used and the reflection from the CTRL flash appears as a bright spotlight. Furthermore, since automatic flash metering is used, the spotlight may make metering less precise.
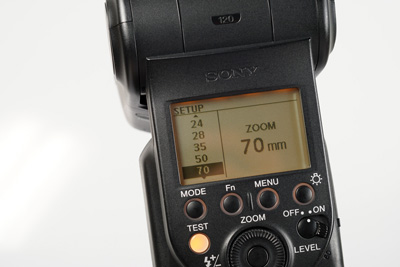
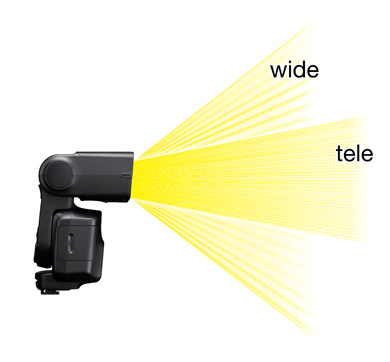
You can use the manual zoom control to alter the coverage of the flash beam. For example you can switch from wide to spot illumination as needed. This gives you an additional option for more creative lighting. For example, set the zoom of the flash to a short focal length (wide setting) to evenly light a larger subject or room, or set it to tele in order to emphasize certain parts of the subject. The closer the flash is placed to the subject, the stronger the effect will be. Please note that when you use the auto zoom control, the flash coverage will switch to the wide setting automatically when it is detached from the camera, independent of the focal length of the lens.

Shot with 24mm flash coverage

Shot with 105mm flash coverage
Another effect of changing the flash coverage setting is an extended flash range when a longer focal length (tele) is set. As the same amount of energy is distributed over a smaller angle with the tele setting, the guide number (range) will increase, so you can light more distant subjects.
Tips: