STEP3. Output
- When you have finished with brightness / color adjustment and reached satisfying results, save the images.
In Image Data Converter, converting RAW images to JPEG or TIFF and saving them is called "output." On the other hand, overwriting them or saving them as different names while remaining the format type is called "save."
The procedure to output images is described below. - First, switch to the [Standard Display].
- Output can be performed from both the View Mode and the Edit Mode.
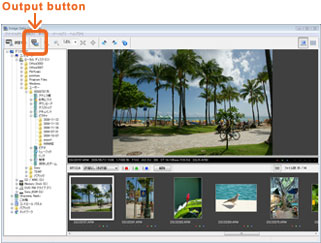
Select the image you want to output, and click the Output button on the tool bar.
To output mutiple images at a time, output them from the View Mode.

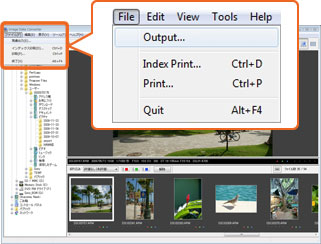
You can also select [Output] from the menu bar.

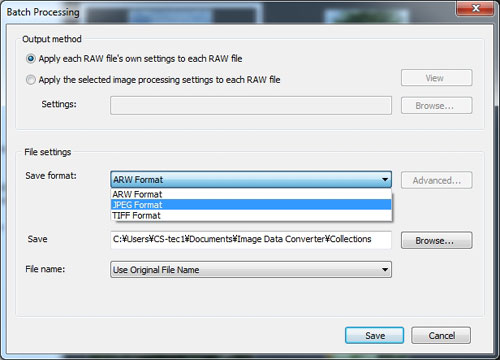
The output window appears. Select settings such as file type here.
Save as type: If you use it for general purpose such as printing, we recommend that you should select [JPEG Files].
Confirm the setting and folder to save, and click [Save].

Now output has finished.
Tips
If you want to process the RAW image later with the same parameters and settings, select [Save] or [Save As...] from the [File] menu to save the RAW image, too. The original parameters (As shot version) remain even if you overwrite it by saving.
However, RAW images saved with Image Data Converter SR cannot be opened in principle with software of other companies such as Apple iPhoto or Adobe Lightroom. If you use these softwares, leave the original images as they are; save the adjusted images only as different files by selecting [Save As...].
