Global
Support / Contact Us
Support / Contact Us
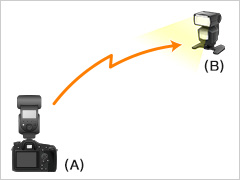
(A): Controller
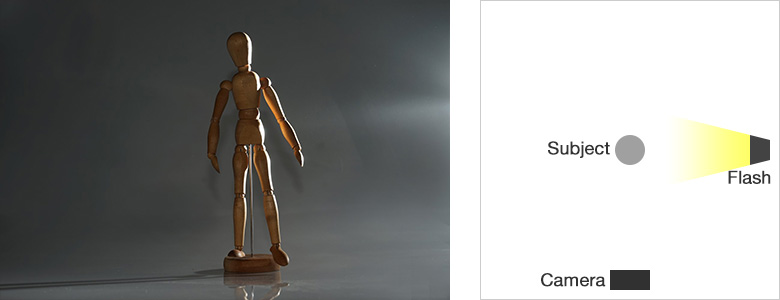
(B): Off-camera flash
In the basic setting, the external flash is used as the wireless flash controller. If you use an A-mount camera, the built-in flash can also be used as a controller instead of the external flash. During exposure, only the off-camera flash will contribute to the final image, but even with this single off-camera light source you can achieve much better illumination than with the direct flash mounted on the camera.
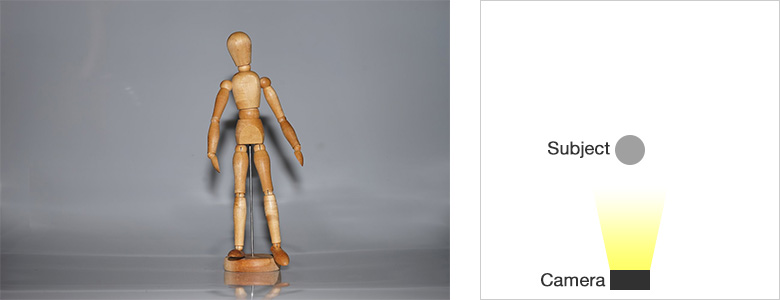
Frontal direct flash: the on-camera flash generates strong shadows that dominate the scene.
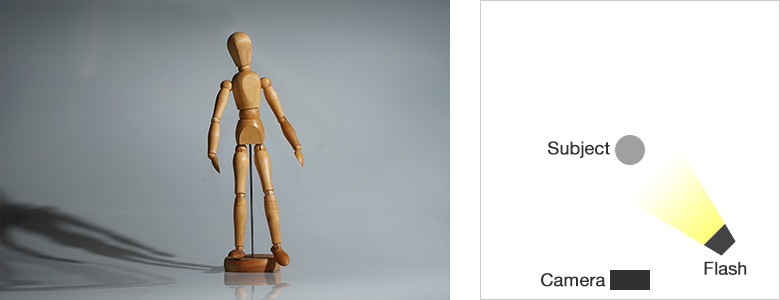
With Wireless Flash, varied lighting control is possible by simply changing the position of the external flash.
Diagonally ahead
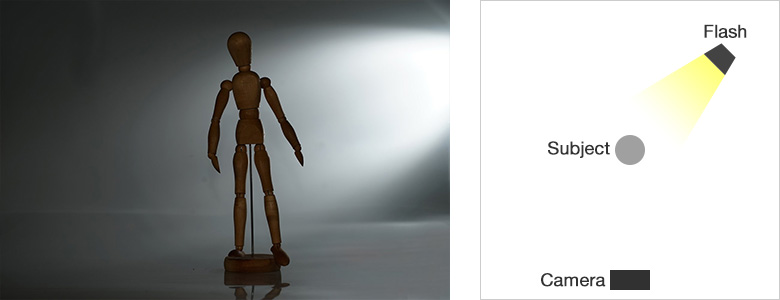
Diagonally behind
To the side
Tips:

The advanced Sony Wireless Flash protocol, which is available when using the HVL-F60M, HVL-F43M, HVL-F58AM, or HVL-F43AM as the controller, allows you to set a lighting ratio between each of the flashes used in a scene. Unlike in the most basic mode where the controller does not contribute to the flash exposure, using Ratio Flash allows the controller (CTRL flash) to both control the external flashes and illuminate the scene. Furthermore, you can define different lighting ratios between each flash. Flash TTL (through-the-lens) metering ensures that the total exposure remains correct. You can also set the flashes to fixed levels like with studio flashes.
You can use several external flashes to illuminate your subject and combine 2 or more flashes into single so-called "groups." Up to 3 groups can be used. The two off-camera (remote) flash groups, called "RMT" and "RMT2," can consist of an unlimited number of flashes. Group 3 consists of the CTRL flash mounted on the camera, which can be used as a fill light. When you take a picture, all three groups fire in synchronization and the camera determines the correct flash exposure.
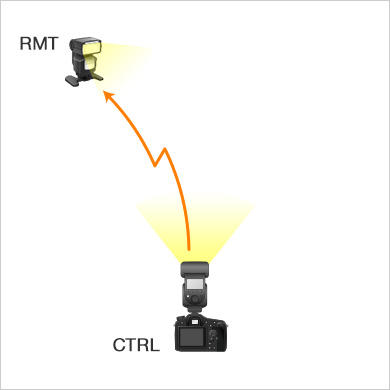
Example of 2 groups: There is a lighting ratio between 2 groups, consisting of the on-camera flash (controller) and off-camera flash.
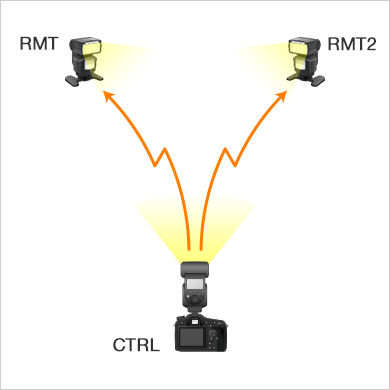
Example of 3 groups: There is a lighting ratio among 3 groups, consisting of the on-camera flash and 2 off-camera flashes.
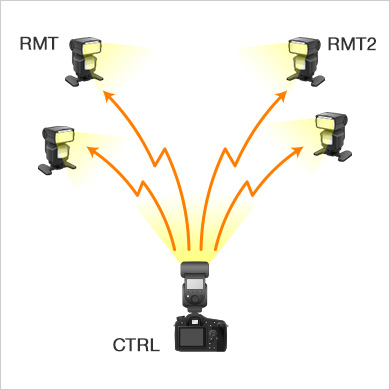
Example of 3 groups with multiple flashes in each group: Both RMT and RMT2 consist of 2 flashes. The illumination from the on-camera flash, RMT, and RMT2 can be adjusted independently.
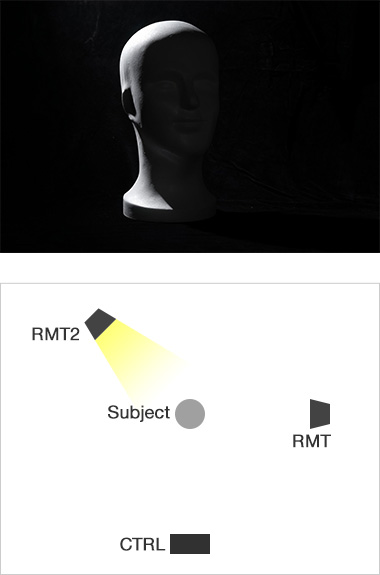
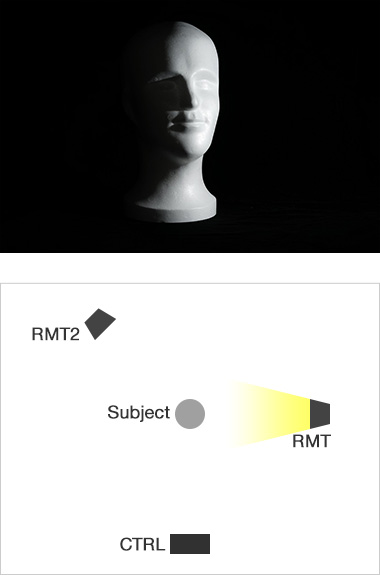
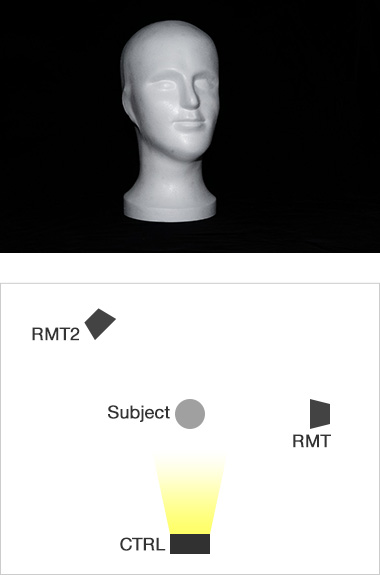
The images below illustrate the different effects when using Wireless Ratio Flash with 3 groups. In the first row, you can see the lighting from each flash when fired individually. In the second row, the level of the RMT flash (right side of the subject) is raised to gradually brighten the right part of the image, while the ratio between the other two flashes remains unchanged.
Example of lighting
CTRL:RMT:RMT2
1:1:16

1:4:16

1:8:16

1:16:16

The ratio settings are displayed on the LCD screen of the flash. To establish the absolute ratio, add the values and divide the set number by the sum. For example, when CTRL = 1, RMT = 8, and RMT2 = 16 are set, the lighting ratio is as follows:
CTRL = 1 / 25
RMT = 8 / 25
RMT 2 = 16 / 25
Settings like 1:1:1 and 4:4:4 or 1:2:4 and 2:4:8 are equivalent.
When one group (RMT or RMT2) includes multiple flashes, the output is divided by the number of the flashes in the group.

