Global
Support / Contact Us
Support / Contact Us

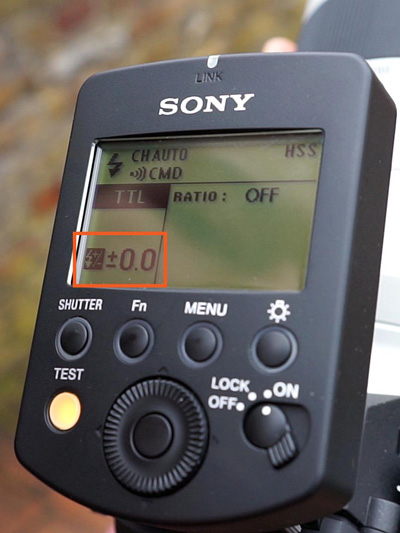
The flash level is set automatically based on a value metered by the camera.
Flash compensation and ratio can be controlled using the commander.
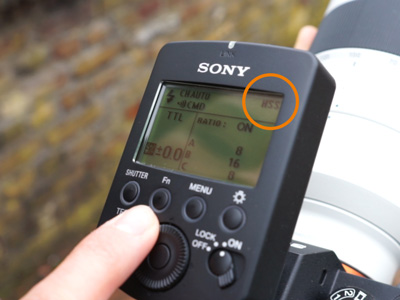
You can control the flash compensation from the commander or by using the same function on the camera. Bear in mind that the compensation from both will be added up. On the LCD panel of the flash unit, however, only the compensation value specified on the unit is displayed.
With TTL Ratio, you can control the relative output of light among the flashes. The overall output of light stays the same.
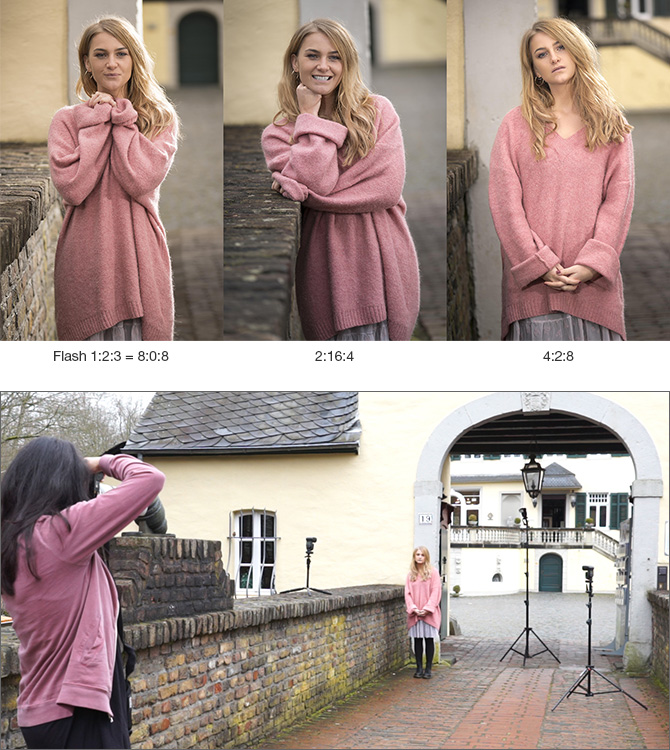
In manual mode, you can work with the flashes just as you would with professional studio flashes. Set the absolute output for each flash individually and create the lighting from scratch.

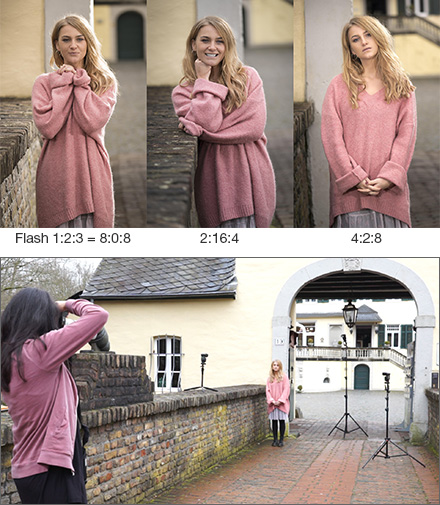
Flash output:
Flash 1: 1/8
Flash 2: 1/16
Flash 3: 1/32

Flash output:
Flash 1: 1/16
Flash 2: 1/8
Flash 3: 1/32

Total control in manual mode

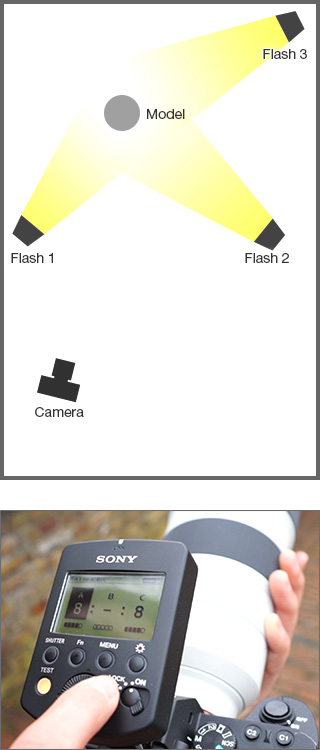
In Group Mode, you can divide 15 flashes into up to five groups. Groups D and E must be set to Manual, while the first three groups can be set to Manual or TTL.
This setup is useful if, for example, you have a main subject that moves toward and away from the camera. The flashes for the main subject can be set to TTL to achieve the correct exposure, while the flashes for the background can be set to Manual Mode in order to achieve different lighting effects.

Flash settings and output:
Flash 1: TTL
Flash 2: 1/32
Flash 3: 1/32

Flash settings and output:
Flash 1: TTL
Flash 2: 1/16
Flash 3: 1/4
In regular flash shooting, there is a maximum shutter speed called the flash sync speed that can limit you to, for example, shutter speeds below 1/125 or 1/250. This makes it difficult to capture fast-moving subjects.
The Radio-Controlled Lighting System is capable of shooting with HSS. HSS enables synchronization at all shutter speeds. This is helpful when taking portraits where an open aperture is required, as well as when capturing action or movements that you want to freeze.


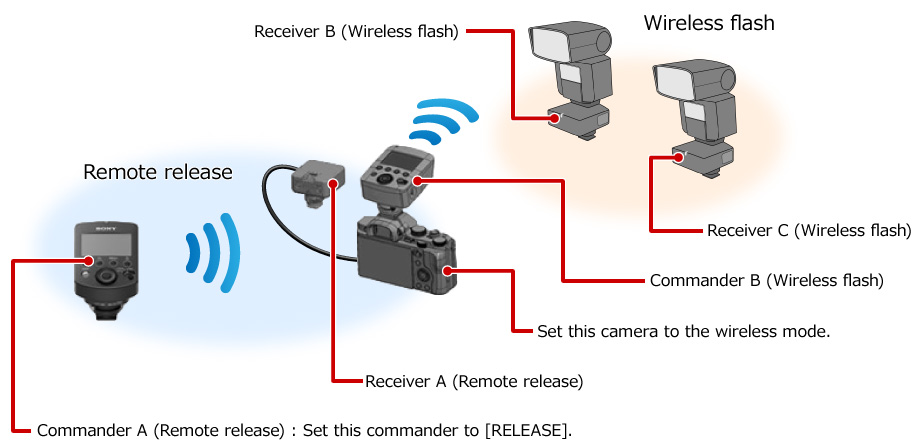
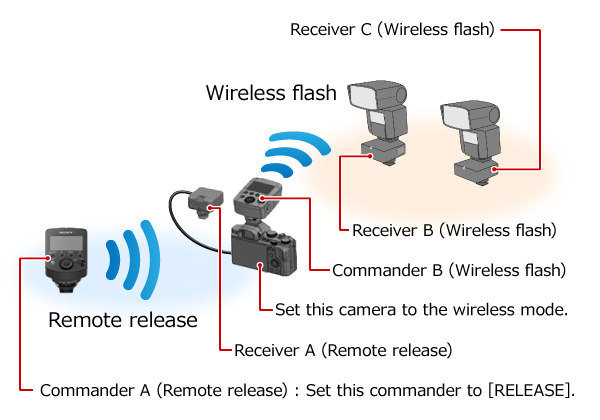
To release the shutters of both the commander-side and receiver-side cameras, press the shutter button on the commander-side camera. To release the shutter of the receiver-side camera(s) only, press the center button or the shutter button on the commander.

Press the center button or the shutter button on the commander to release the shutter of the receiver-side camera(s).

You need the VMC-MM1 Multi-Terminal Connecting Cable (sold separately) to connect the camera to the receiver.


Remote release is helpful when you can't press the shutter button on the camera due to the camera's position.
A flash can also be used when shooting with remote release.
Refer to the website below for details.

The receiver is attached to the tripod.

The flash is inserted into the camera’s multi-interface shoe.

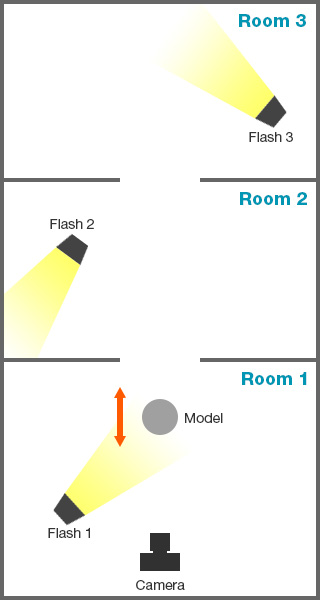
You can control the off-camera flash units to fire in synchronization with the remote release. The figure below is one example of the settings. Commander A and Receiver A for remote release, and Commander B and Receiver B/C for wireless radio flash.