
Setup for Remote Release
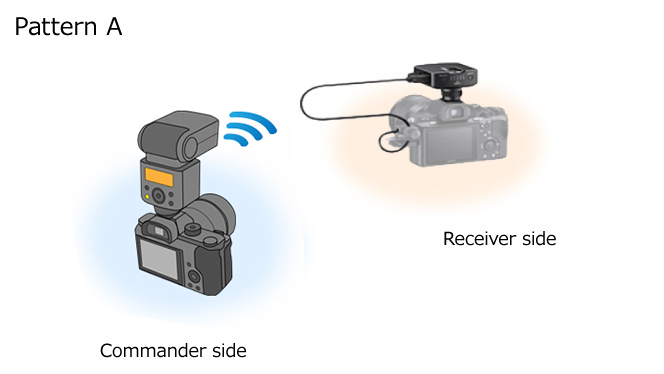
Using the Radio-controlled system, you can perform remote-release shooting with up to 15 cameras simultaneously. The commander can either be attached to the camera (Pattern A) or used independently (Pattern B).
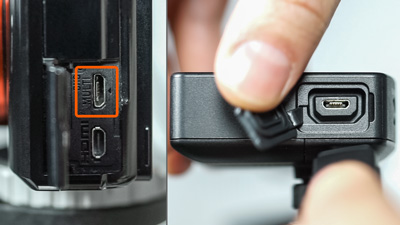
You need a VMC-MM1 Multi-Terminal Connecting Cable (sold separately) to connect the receiver-side camera to the HVL-F60RM2/F60RM or the FA-WRR1 Wireless Radio Receiver.
- The HVL-F46RMA/F46RM/F45RM/F28RMA/F28RM Flash does not work as a commander nor a receiver for remote release.

1. Pairing and the settings for the flash unit
You need to establish a pairing with a radio wireless commander/receiver in advance. In addition, when you use an HVL-F60RM2/F60RM, specify the flash unit as either a commander [CMD] or a receiver [RCV].
Refer to the website below for details.
2. Setup for the camera
The following steps 1 and 2 are not necessary for a receiver-side camera with the FA-WRR1 attached. Follow step 3 only.
-
Set the shooting mode to the P (Program Auto), A (Aperture Priority), S (Shutter Priority), or M (Manual) mode.

-
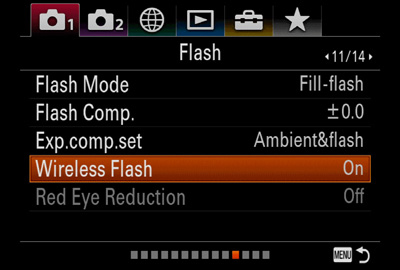
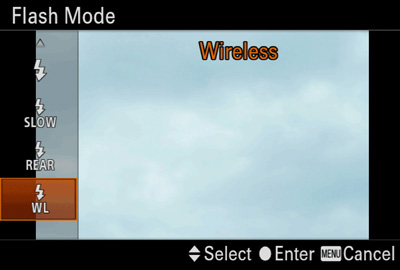
Make sure that the camera’s flash mode is set to wireless. How to set varies among cameras.
When the flash does not fire even if set to wireless, the screen display will show (Flash Cancelled).
-
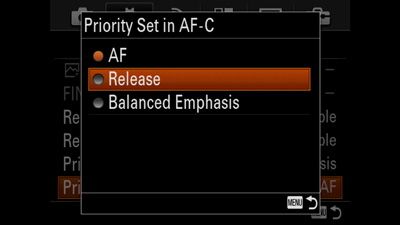
Set [Priority Set in AF-S/C] (or [Priority setup]) to [Release], or select manual focusing in order to ensure that the camera will actually take the picture.
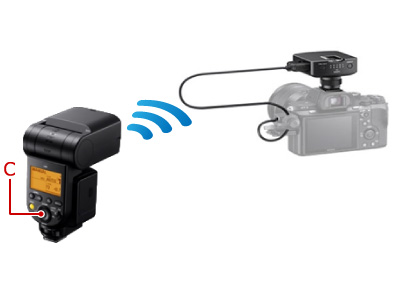
3. Connect the camera to the receiver
Connect the camera to the receiver using the VMC-MM1 Multi-Terminal Connecting Cable (sold separately).
4. Set the commander to remote-release
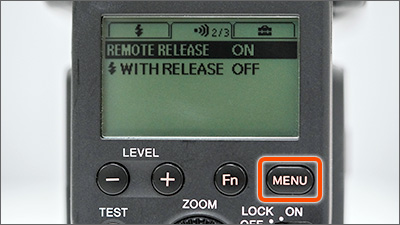
 When using the HVL-F60RM2/F60RM as the commander
-
Select MENU button > [REMOTE RELEASE] > [ON].
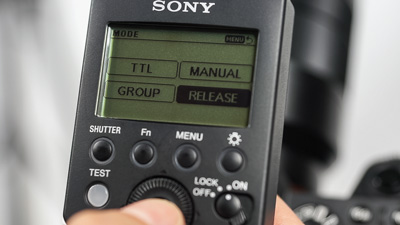
- When using the FA-WRC1M as the commander
-
Select the Fn button, then move the cursor to a shooting mode such as [TTL], and select [RELEASE].
5. Take a picture
- When using the commander attached to the camera (Pattern A)
-
To release the shutters of both the commander-side and receiver-side cameras, press the shutter button on the commander-side camera (A).
To release the shutter of the receiver-side camera(s) only, press the center button or the shutter button on the commander (B).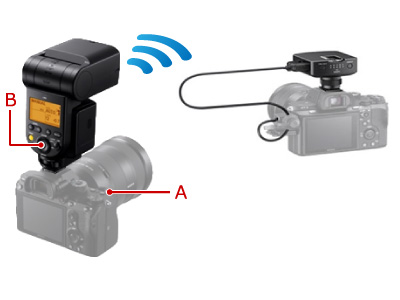
- When using an independent commander (Pattern B)
-
Press the center button on the flash or the SHUTTER button on the commander (C) to release the shutter of the camera(s).
Using a flash in remote release
- When using the HVL-F60RM2/F60RM
-
Press the MENU button on the flash and select [
 WITH RELEASE] > [ON]. The flash fires for remote release shooting regardless of the setting of commander/receiver.
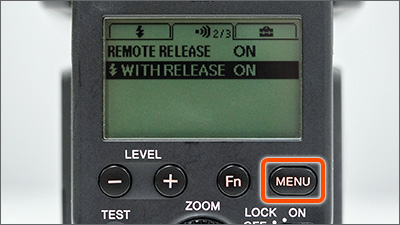

- When using the FA-WRR1
-
To use the flash during remote-release shooting, attach the flash directly to the camera, and the receiver to the tripod or accessory bracket.
The flash will not fire if it is attached to the receiver.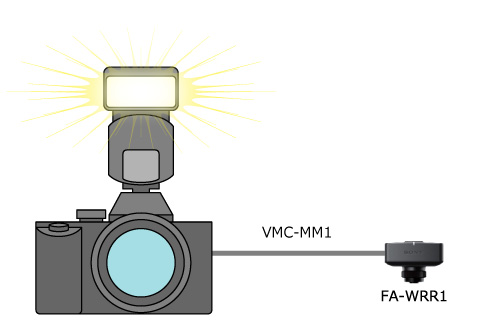

Continuous shooting in remote release
If both cameras are set to continuous drive mode, you can perform continuous shooting with both cameras by pressing and holding down the shutter button on the commander-side camera (A). However, the continuous shooting speed of the receiver-side camera may be slow. To maintain the continuous shooting speed of the receiver-side camera, perform either of the steps below.
-
Press the button on the commander (B) to release the receiver-side camera only.

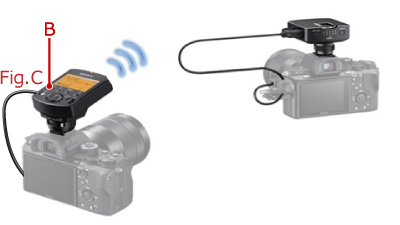
-
Connect the camera to the commander using the VMC-MM1 Multi-Terminal Connecting Cable (Fig. C) and press the button on the commander (B). This releases both shutters on the commander-side and receiver-side cameras.
Silent shooting in remote release
The electronic shutter is used in silent shooting mode. When you use the electronic shutter, you will not be able to perform remote-release shooting with the previously described Pattern A.
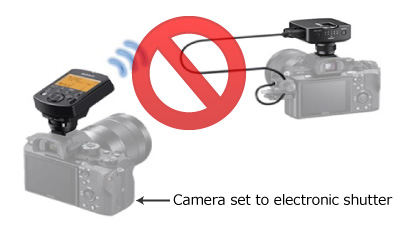
To release the shutters of both the commander-side camera and the receiver-side camera(s), detach the commander from the camera. Then reconnect the commander and camera using the VMC-MM1 Multi-Terminal Connecting Cable, and press the shutter button on the commander.
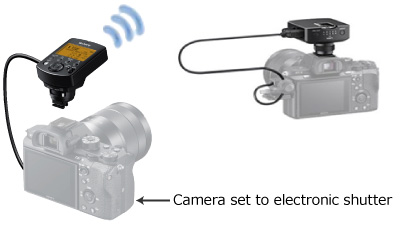
The electronic shutter is used in the following cases.
- The camera is equipped with [Silent Shooting] and this setting is enabled.
- The camera is equipped with [Shutter Type] and it is set to [Electronic Shut.], or it is set to [Auto] and the drive mode is set to continuous shooting.