
Setup for Wireless Flash
1. Pairing and settings for the flash unit
You need to establish a pairing with a radio wireless commander/receiver in advance. In addition, when using a flash unit supporting radio communication, designate the flash unit as either a commander [CMD] or a receiver [RCV].
Refer to the website below for details.
2. Setup for the camera
Set the shooting mode to P (Program Auto), A (Aperture Priority), S (Shutter Priority), or M (Manual Exposure) mode.

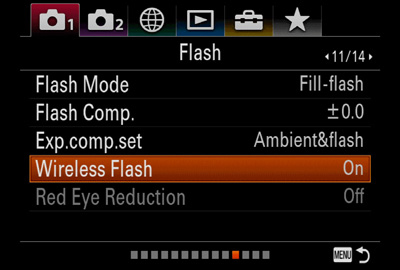
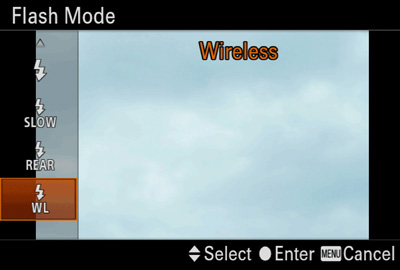
Be sure that the camera’s flash mode is set to wireless. The procedure for this setting varies among cameras.
3. Changing flash settings
To change the flash settings, press the Fn button.
Use the up/down/right/left buttons on the direction buttons or control wheel to move the cursor to the item you want to change, and then turn the wheel to select the desired setting.
- When using the HVL-F28RMA/F28RM as the commander, attach the flash unit to the camera and work with [External Flash Set.] of the menu of the camera. The [External Flash Set.] feature is available with some camera models.
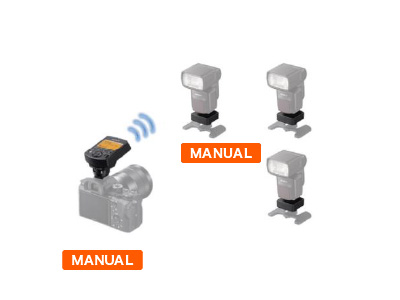
For the flash mode, you can select [TTL], [MANUAL] or [GROUP]. Make this setting on the commander unit.
When the flash units are divided into up to three groups and TTL and manual flash mode are not mixed, you can take photos with the flash mode set to [TTL] or [MANUAL]. When [GROUP] is selected for the flash mode, you can take photos with the flash units divided into up to five groups, and TTL and manual flash mode can be mixed.
4. Taking photos
 Wireless flash photography
-
All the flash units fire at the same flash power level.
- Position the commander [CMD]① and the receiver [RCV]②.
- Check that the LINK lamps of both the commander and the receiver are lit in green (good communication status).
- When the TEST button lights in orange, the flash units are ready to fire. Press the shutter button on the camera to take a photo with the flash.
- Multiple wireless flash photography with flash power ratio control
-
Use this method to take photos when there are up to three wireless groups and TTL and manual flash mode are not mixed.
- Position the commander [CMD]① and the receivers [RCV]②.
- Press the Fn buttons on the receivers ② to check that [RCV REMOTE] is [OFF]. Then select the group from "A," "B," or "C."
- If [RCV REMOTE] is [ON], set it to [OFF].
- When using the HVL-F28RMA/F28RM, turn the power switch to "A," "B," or "C" to set the group.
- When using the radio wireless receiver FA-WRR1, press and hold the GROUP button for two seconds or more to turn off the REMOTE lamp. Then press the GROUP button again in that condition to select the group.
- Press the Fn button on the commander ① to set [RATIO CONTROL] to [ON]. Then select the flash power level for each group "A" to "C."
- The commander is a member of group A.
- For example, during TTL flash photography with a flash power ratio of 4:2:1, the flash units in each group fire flashes with a fraction of the total flash power: 4/7, 2/7, and 1/7, respectively.
- Check that the LINK lamps are lit and the flash units are ready to fire. Then press the shutter button on the camera to take a photo with the flash.
- Multiple wireless flash photography (group flash)
-
When [GROUP] is selected for the flash mode, you can take photos with the flash units divided into up to five groups, and TTL and manual flash mode can be mixed. You can control up to 15 receivers.
- Position the commander [CMD] and the receivers [RCV].
- Press the Fn buttons on the receivers and confirm that [RCV REMOTE] is [OFF]. Then, select a group from A to E.
- If [RCV REMOTE] is [ON], set it to [OFF].
- TTL flash photography is not available for groups D and E.
- The HVL-F28RMA/F28RM cannot be specified as a member of group D or E.
- When using the radio wireless receiver FA-WRR1, press and hold the GROUP button for two seconds or more to turn off the REMOTE lamp. Then press the GROUP button again in that condition to select the group.
- Press the Fn button on the commander to select [GROUP] as the flash mode. Then select the flash mode (TTL or MANUAL) and the flash power level for each group A to E.
- Check that the LINK lamps are lit and the flash units are ready to fire. Then press the shutter button on the camera to take a photo with the flash.
- Changing the settings of receiver units from the commander unit
-
You can make wireless group settings and zoom settings by working on the commander side instead of the receiver side.
- When the HVL-F28RMA/F28RM is specified as a receiver, the wireless group and other settings cannot be made from the commander side.
- Press the Fn buttons on the receivers to set [RCV REMOTE] to [ON] beforehand.
- When using the radio wireless receiver FA-WRR1, press and hold the GROUP button for two seconds or more to light the REMOTE lamp.
- Press the MENU button on the commander to select [RECEIVER SET]. Then make the settings for each receiver.
-
When using a non-radio flash unit
-
When using the HVL-F42AM/F43AM/F58AM as a receiver, TTL flash photography is not available. Take photos in manual flash mode.
Set both the commander and the remote flash(es) to [MANUAL]. The flash level can be controlled on the remote-flash side.
Setup tutorial video
This video explains how to perform the setup using the FA-WRC1M Wireless Radio Commander and the FA-WRR1 Wireless Radio Receiver.