Creating time-lapse movies
You can create time-lapse movies from still images shot using interval shooting with the computer application Imaging Edge Desktop.
The movies created are saved in MP4 format.
Creating the movies
-
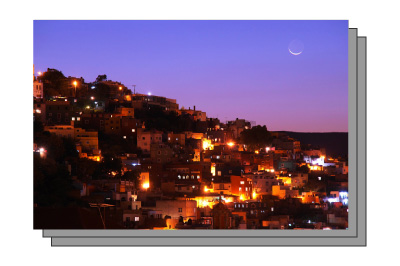
Interval shooting
The camera captures a series of still images automatically, based on the interval time and number of shots set in advance.
Although the movies cannot be created on the camera, you can use continuous playback to check the results.
-
Creating time-lapse movies
Select the captured images and create a time-lapse movie.
Interval shooting
Setting the camera
-
[
 Interval Shoot Func.]
MENU →
 (Camera Settings1) → [Interval Shoot Func.] and complete the following items.
- [Interval Shooting]: Set to [On].
- [Shooting Start Time]: Sets the amount of time from when you press the shutter button to the first interval shooting shot. (1 second to 99 minutes 59 seconds)
- [Shooting Interval]: Sets the shooting interval (time from when one exposure starts to when the exposure for the next shot starts). (1 second to 60 seconds)
- [Number of Shots]: Sets the number of shots for interval shooting. (1 shot to 9999 shots)
- [AE Tracking Sensitivity]: Sets the tracking sensitivity of auto exposure against the change in luminance during interval shooting. If you select [Low], exposure changes during interval shooting will be smoother. ([High] / [Mid] / [Low])
- [Silent Shoot. in Interval]: Sets whether or not to perform silent shooting during interval shooting. ([On] / [Off])
- [Shoot Interval Priority]: Sets whether or not to prioritize the shooting interval when the exposure mode is [Program Auto] or [Aperture Priority] and the shutter speed becomes longer than the time set for [Shooting Interval]. ([On] / [Off])
-
[
 Aspect Ratio]
16:9 is recommended for [
Aspect Ratio] during shooting if you will use the Imaging Edge Desktop application on a computer to create time-lapse movies. 16:9 is the aspect ratio of movies created by Imaging Edge Desktop. MENU →
(Camera Settings1) → [Aspect Ratio] → 16:9 (recommended setting).
Hint
Because Imaging Edge Desktop creates movies with an aspect ratio of 16:9, black bars will appear on the left and right sides of movies created from interval shooting with [![]() Aspect Ratio] set to 3:2 or 1:1 if you set [Trimming setting] in Imaging Edge Desktop to [Enlarge to Fit Aspect Ratio (With Space)].
Aspect Ratio] set to 3:2 or 1:1 if you set [Trimming setting] in Imaging Edge Desktop to [Enlarge to Fit Aspect Ratio (With Space)].
Example of black bars in a movie created with [Trimming setting] in Imaging Edge Desktop set to [Enlarge to Fit Aspect Ratio (With Space)]

Shot at 16:9

Shot at 3:2

Shot at 1:1
Related camera help guide
Guide to using the camera
Shooting notes and recommended settings
Changes in brightness or color tone between images captured in interval shooting may cause flickering and rough movement in the resulting movie.
These settings are recommended.
- [Face/Eye AF Set.]: [Off]
- [White Balance]: Other than [Auto] or [Underwater Auto]
- [AE Tracking Sensitivity]: [Low]
- [Silent Shoot. in Interval]: [On]
- [SteadyShot]: [Off]
- Without using flash
Hint
During interval shooting, if you want to individually adjust each shot according to the change in color tone, set [![]() Shutter AWB Lock] to [Off], and set [White Balance] to [Auto].
Shutter AWB Lock] to [Off], and set [White Balance] to [Auto].
Related camera help guide
Note
- With short interval time settings, card write speeds that are slower than the interval time may prevent shooting at your specified interval time. Be careful in situations where more card space is required to save each image (such as when shooting RAW images).
On-camera playback of images from interval shooting
Although time-lapse movies cannot be created from interval shooting images on the camera, you can use continuous playback for these images to check the results. The images from interval shooting are shown as a group on the playback screen.
Procedure
-
MENU →
 (Playback) → [Cont. PB for Interval].
 -
(Playback) button → use the control wheel to select grouped images to play → press the center of the control wheel.
Grouped images
-
Press the center button to start continuous playback.

Hint
Playback speed can be adjusted during continuous playback by turning the control wheel. In [PB Speed for ![]() Interval], you can also set the continuous playback speed for still images.
Interval], you can also set the continuous playback speed for still images.
Related camera help guide
Remote shooting
Using “Remote” in the Imaging Edge Desktop application allows you to shoot images remotely.
Creating time-lapse movies
To create time-lapse movies, you will need the latest version of the computer application Imaging Edge Desktop. Please install this application on your computer.
See the following page for the procedure used to create time-lapse movies.
*The menu screen images on this web page have been simplified for display purposes, and do not exactly reflect the actual screen display of the camera.