Adjusting images
You can use each palette to adjust brightness, color tones, effects, etc.
You can change the ordering of the palettes by dragging and dropping  (Reorder icon) in the top right of each palette. You can make the palettes easier to use by performing customizations such as placing the palette you use most frequently at the top.
- Brightness (exposure compensation)
- White Balance
- Creative Style / Creative Look
- Contrast
- D-Range Optimizer / HDR effect
- Highlight color distortion reduction
- Color
- Shading Compensation
- Sharpness
- Noise Reduction
- Lens Correction
- Tone Curve
- Display Control
- Pixel Shift Multi Shooting Correction
- Version Stack
Hint
When the image format is JPEG, TIFF, or HEIF, only the following functions are available with Edit.
- Adjusting the tone curve
- Adjusting the shading compensation
- Rotating the image
- Display Control adjustment
- Cropping and Inclination Correction
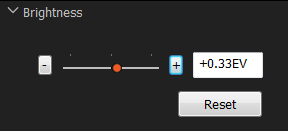
Brightness (exposure compensation)
This feature corrects the brightness of the entire image. You can set the exposure compensation value by moving the slider or entering a value. You can also increase or decrease the exposure compensation value by 1/3 EV each time you click the [+] or [-] button. When you click the [Reset] button, the value returns to its default.
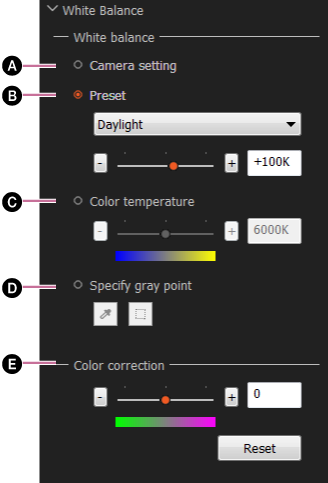
White Balance
-
A Camera setting
Select this setting to use the white-balance settings at the time of shooting.
-
B Preset
Select a white-balance setting to apply. You can fine-tune the white balance by moving the slider.
-
C Color temperature
Select a color temperature from amber to blue with the slider, or specify a value.
-
D Specify gray point
To reproduce the white balance more precisely, you can specify an achromatic area in the image and use it as a reference for the white balance. You can specify the point using
 (Pick Color) or
  (Area Selection Tool).
 -
E Color correction
You can correct color casts from green to magenta.
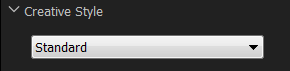
Creative Style / Creative Look
You can set the color rendering style. Select a style from the presets.
The Creative Style / Creative Look name and setting details are the same as those of the camera you are using.

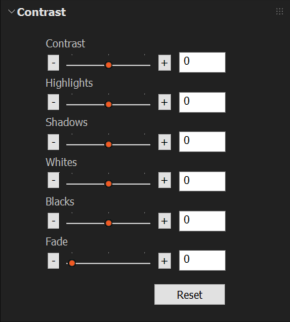
Contrast
Contrast: When you click the [+] button, the contrast increases and the impression of the image becomes harder. When you click the [-] button, the contrast decreases and the impression of the image becomes softer.
Highlights: You can adjust the brightness of the brightest part. This function is convenient when you want to reduce clipped highlights.
Shadows: You can adjust the darkness of the darkest part. This function is convenient when you want to reduce clipped shadows.
Whites: You can adjust the brightness over the entire histogram based on the white level. This function is convenient when you want to adjust the dynamic range of the entire image.
Blacks: You can adjust the darkness over the entire histogram based on the black level. This function is convenient when you want to adjust the dynamic range of the entire image.
You can adjust the degree of fade in [Fade].
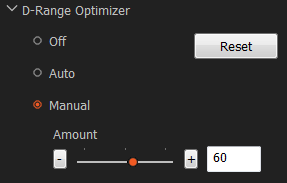
D-Range Optimizer / HDR effect
“D-Range Optimizer” is displayed for ordinary images, and “HDR effect” is displayed for composite images created by combining multiple images shot using Shooting for HDR.
When [Auto] or [Manual] is selected, the D-Range Optimizer analyzes the scene and processes highlights and shadows individually to correct them to their optimal brightness and tone balances. When [Manual] is selected, you can perform fine-tuning for the appropriate amount using the [Amount] slider.

Note
- You cannot adjust the D-Range Optimizer for ARQ images shot with Pixel Shift Multi Shooting.
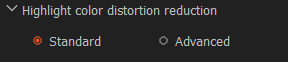
Highlight color distortion reduction
When [Advanced] is selected, the high-luminance areas (highlights), such as sky shot under very bright lighting conditions are adjusted and reproduced with a more natural tone.
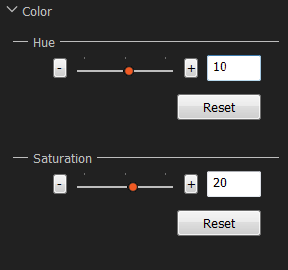
Color
You can adjust the hue and saturation of the image.
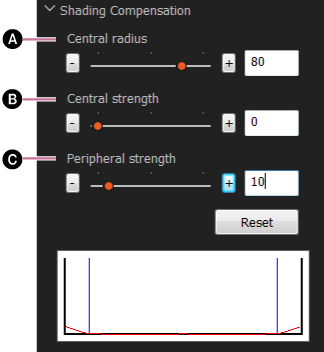
Shading Compensation
Physical characteristics of the lens result in less illumination in peripheral areas of the image. You can compensate for this phenomenon by adjusting the center and peripheral areas separately.
-
A Central radius
You can set the radius of the central area.
-
B Central strength
You can adjust the strength of luminance correction for the inside of the area specified in [Central radius].
-
C Peripheral strength
You can adjust the strength of luminance correction for the outside of the area specified in [Central radius].
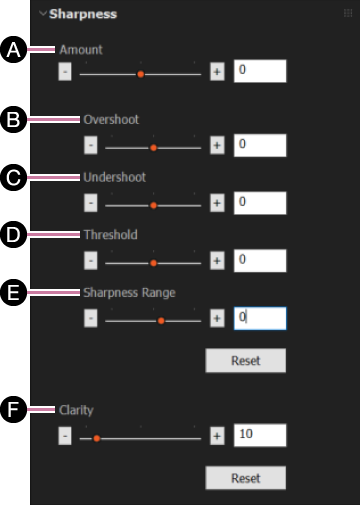
Sharpness
In order to sharpen an image, set the level of enhancement for the contours.
-
A Amount
You can adjust the overall sharpness of the image.
-
B Overshoot
You can adjust the level of enhancement for contours in the overshot direction.
-
C Undershoot
You can adjust the level of enhancement for contours in the undershot direction.
-
D Threshold
You can set the threshold for applying contour enhancement.
-
E Sharpness Range
You can adjust the range to which the sharpness effect is applied. Making the value smaller shifts the range toward the low-frequency band, and making the value larger shifts the range toward the high-frequency band.
-
F Clarity
You can adjust the clarity.
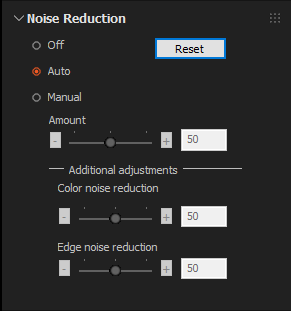
Noise Reduction
When [Auto] is selected, automatic correction is performed at a level suitable for the image. If you select [Manual], you can adjust the amount of noise reduction, correct color noise (roughness of colors), and reduce edge noise.
Note
- Depending on the original image and the amount of adjustment, noise reduction may cause the image resolution to deteriorate.
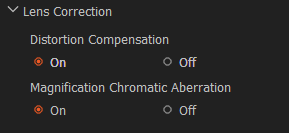
Lens Correction
You can correct phenomena caused by physical characteristics of the lens, such as distortion and chromatic aberration.
Tone Curve
Histograms and tone curves for all the channels (RGBY) are displayed.
You can drag the tone curve to adjust each channel.
The horizontal axis indicates the brightness level of the original image, and the vertical axis indicates the brightness level of the adjusted image. Since the brightness levels of the input image and the output image are the same before adjustment, the tone curve is a straight line at a 45-degree angle in the upper right.
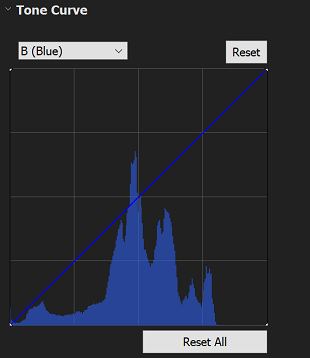
Select the channel ([>Y (Brightness)], [R (Red)], [G (Green)], or [B (Blue)]) that you want to adjust from the drop-down list. Drag any point on the tone curve to the desired position in order to change the curve and adjust the brightness of the image. Dragging toward the upper left-hand corner makes the image brighter, and dragging toward the bottom right-hand corner makes it darker. To set a control point, click on a point in the area. The tone curve will go through the specified control point.
Select [Reset] to reset only the currently selected channel. Select [Reset All] to reset all the channels.
Hint
- Once you set a control point, you can move it by dragging and dropping. You cannot move a control point horizontally beyond other control points.
- You can delete a control point by double-clicking it or dragging it outside the graph.
Display Control
You can display clipped shadows, clipped highlights, and out-of-gamut colors. Adjusting the display for editing

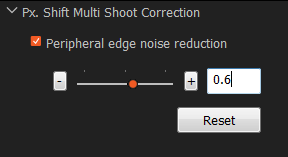
Pixel Shift Multi Shooting Correction
You can reduce noise that appears at the edges of images in Pixel Shift Multi Shooting. This noise is caused by vibrations, etc. You can adjust the amount of correction using the slider.
This panel is displayed only when you select an ARQ image shot with Pixel Shift Multi Shooting.
Version Stack
RAW data in the ARW format can contain multiple sets of image-processing data. Therefore, you can save multiple sets of results from various edits as groups of parameters in one RAW file.
-
Displaying a list of versions of the image
Click
 (Open) in the locked palette and open the [Version Stack] palette.
A list of versions of the currently selected image is displayed. An asterisk (*) appears next to a version that has been modified.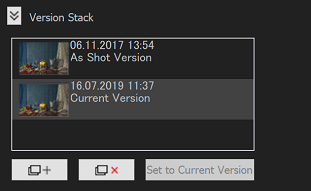
-
Creating a new version
When you click
 (Create New Version), the currently selected version is copied and added as a new version.
 -
Switching versions
Click a version in the version list to select and edit it.
-
Setting a version as the “Current Version”
The version to be used as the default version when a particular version is not specified is called the “Current Version.” In the versions list, click a version to set as the “Current Version,” and then click [Set to Current Version]. The next time you launch the application, the selected image will be the “Current Version.”
-
Deleting a version
Click a version in the versions list, and then click
 (Delete Selected Version). You cannot delete the “As Shot Version.” If you delete the currently edited version, the preceding version becomes the currently edited version. If you delete the “Current Version,” the preceding version becomes the “Current Version.”