Single Live View
Switching modes
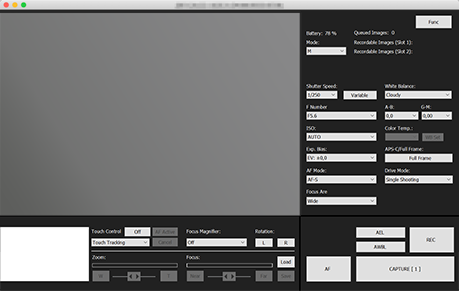
Full Live View mode
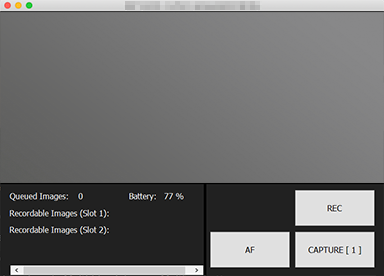
Space-saving Live View mode
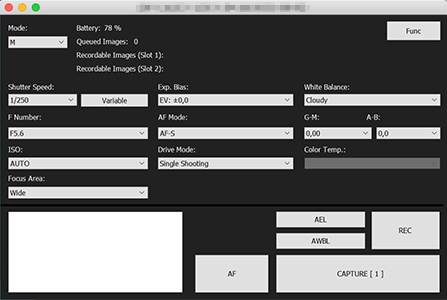
Control View mode
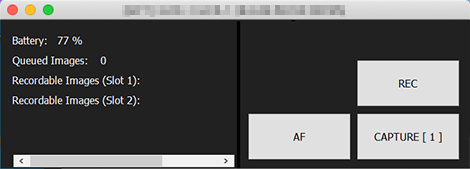
Space-saving Control View mode
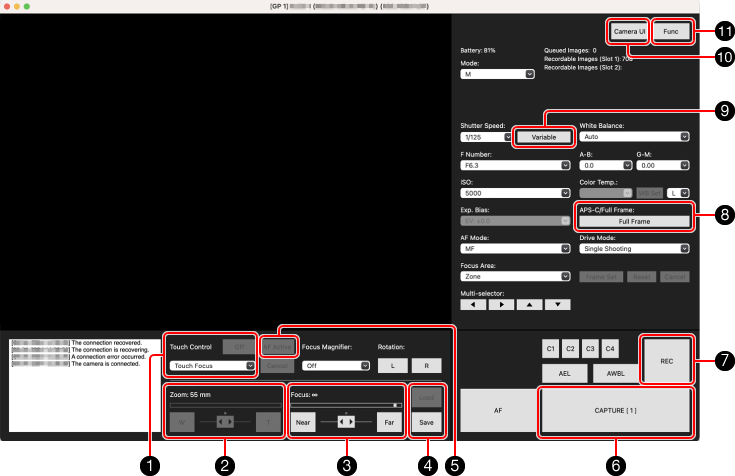
Camera control window / Description of each part
- Do not operate the camera body while performing operations in Remote Camera Tool.
- The supported operations differ depending on the camera model. For details, refer to “Supported cameras.”
-
1 Touch operation
By clicking on a part of the image, you can operate the camera just like you would operate the touch screen on the camera itself.
To cancel tracking, click [Cancel]. -
2 Zoom operation
- Used for zoom operations. Compatible with power zoom lenses.
- Slide the arrows in the center toward the edges to increase the zoom speed. (The area near the center is slower, and the speed increases as you slide toward either edge.)
- You can also set the zoom speed during shooting standby on the camera.
On the camera, select MENU →
 (Shooting) → [Zoom] → [Remote Zoom Speed] → [
 Speed Type] → [Fix], then choose a setting under [Fixed Speed STBY] → [1 (Slow) to 8 (Fast)].
-
3 Focus operation
This function is used for DMF (direct manual focus) mode and MF (Manual Focus) mode.
- In order to use Remote Camera Tool to switch the AF mode to DMF or MF, the focus mode switch of the lens must be in the “AF” position.
- When the focus area is set to Flexible Spot, the focus frame moves to the position where you click on the image.
- Slide the arrows in the center toward the edges to increase the focus speed. (The area near the center is slower, and the speed increases as you slide toward either edge.)
-
4 Saving and loading the focus position and zoom position
You can save up to five sets of lens information, focus position, and zoom position and load the saved setting values when needed.
- It is not possible to save this information if the mounted lens is not supported or when using digital zoom.
-
5 AF Active button
Turning on the [AF Active] button when [Touch Control] is turned on allows you to operate the AF function by clicking any location in the Live View screen.
-
6 Shooting images
Click the [CAPTURE] button.
Once the release is complete, “Captured” is displayed to the upper left of the button, and the Live View frame turns green.
* When using the ILCE-9M2 or ILCE-9, a green frame will be displayed when the still image save destination is set to [Camera Only].
-
7 REC Button
We recommend that you put the camera into still image mode during shooting standby to prevent the temperature of the camera from rising.
-
8 APS-C / Full Frame Switch Button
You can record at the angle of view of the APS-C by setting this button to APS-C.
-
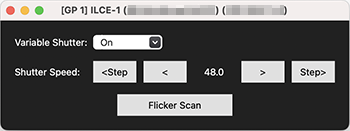
9 Shutter Speed:Variable Shutter
When you select the [Variable Shutter] button, the following dialog box is displayed. Select [On] to adjust the shutter speed.
When you click [Flicker Scan], a shutter speed with little flicker is detected automatically.
-
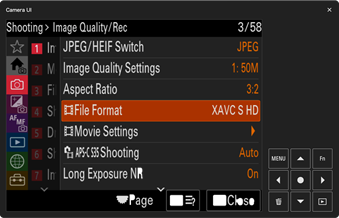
10 Camera UI button
Allows you to display images displayed on the camera’s LCD monitor, check messages, and operate some of the buttons on the camera body.
* Peaking Display on the shooting standby screen and some settings are not displayed.
-
11 Func Button
When you click the [Func] button, the following "Function window" will appear.
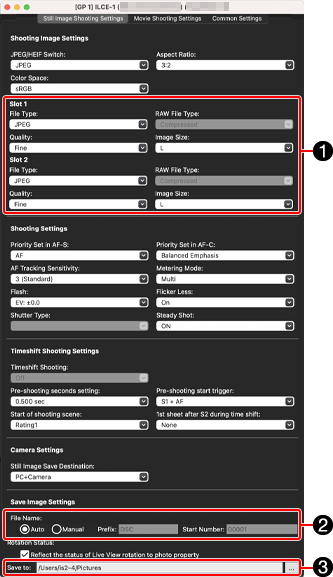
Function window / Description of each part
* The items displayed differ according to the camera model.
-
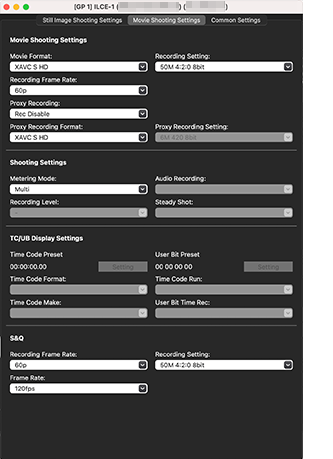
1 Dual-slot recording menu
You can enter separate settings for each slot when connected to a camera.
To use these settings, select MENU → (Shooting) → [Media] → [Rec. Media Settings] → [Recording Media] → [Sort Recording] on the camera beforehand. -
2 Setting the filename and file No.
To specify your desired filename or file No., change them in these dialog boxes.
-
3 Specifying the save location
Specify the save location of shot images.
You can set a different location to save for each camera. -
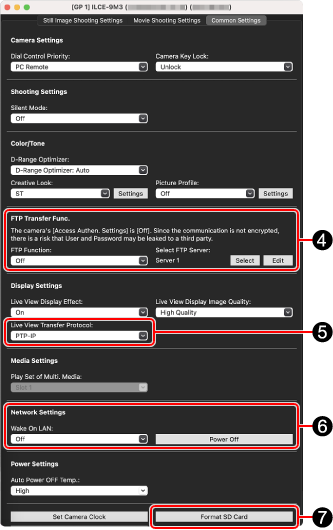
4 FTP transfer function
[Select]:You can select an FTP server that has previously been registered in the camera.
[Edit]:You can edit the setting values of the FTP transfer function.
- Use [Export] to store edited setting values on the computer and [Import] to import setting values stored on the computer to the camera.
- After importing setting values using [Import], the camera restarts.
On the ILCE-9M2, you can select the FTP server from [Select FTP Server] at the bottom under Common Settings.
![Common Settings window on ILCE-9M2. The [Select FTP Server] button at the bottom right of the window is highlighted.](../../share/images/instruction_pct_22.png)
-
5 Live View Transfer Protocol
You can change the communication method used by Live View.
-
6 Wake On LAN setting
For details, refer to “Wake On LAN.”
-
7 Formatting the SD card
This function is available only when an SD card is inserted in the camera, and when [Still Image Save Destination] is set to [Camera Only] or [PC+Camera].