- Visual Story
- How to use
- 6. Settings
 Visual Story
6. Settings
Useful functions such as settings you can use in multiple projects and how to delete data are described below.
6-1. Import Destination setting
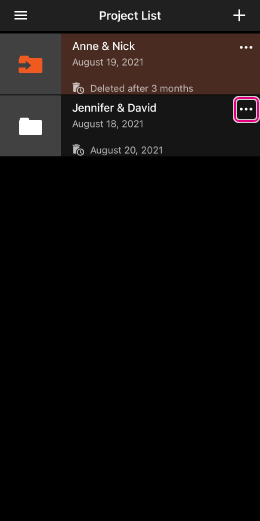
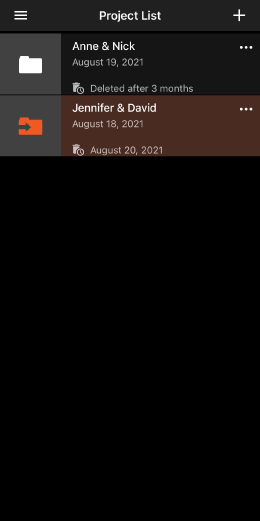
The orange import icon![]() is displayed for the project specified as the image import destination. Perform the steps below if you have created multiple projects and want to change the import destination to a different project.
is displayed for the project specified as the image import destination. Perform the steps below if you have created multiple projects and want to change the import destination to a different project.
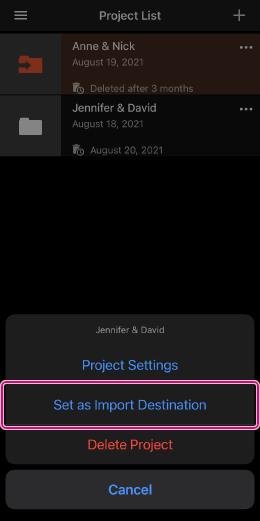
On the [Project List] screen, tap ![]() (Settings) to the right of the project and then [Set as Import Destination].
(Settings) to the right of the project and then [Set as Import Destination].
6-2. Setting and applying Auto Retouch (Photos Only)
By completing retouch settings in advance, you can have the settings applied uniformly to all images. This saves work in retouching after you shoot. You can use the same retouch settings for multiple projects or specify separate retouch settings for individual projects.
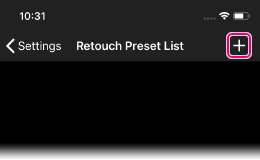
6-2-1. Creating [Retouch Preset Settings]
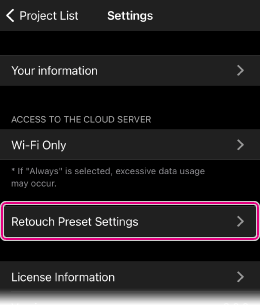
- On the [Project List] screen, tap
 (menu in the upper left) > [Settings] > [Retouch Preset Settings].
- Tap [+] to create new settings.
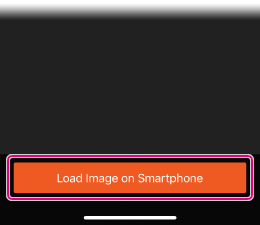
- Tap [Load image on smartphone] at the bottom and select an image of your choice.
- This will be used as the sample image when configuring retouch settings. You will decide retouching parameters based on retouching the sample image.
- Use [Filter] and [Parameter] at the bottom to set your preferred filter and parameter.
- For filters, tap the selected item again to adjust the level.
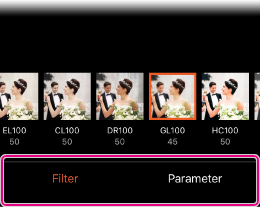
- Tap [Save] in the upper right, and then enter a title for the settings and save them.
6-2-2. Applying [Retouch Preset Settings]
- On the [Project List] screen, select a project to apply the retouch settings to, and then open
 (Settings) at the right end.
 - Select [Project Settings].
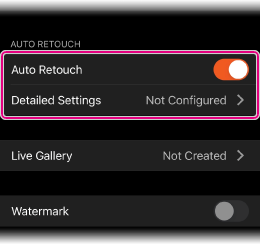
- Turn on [Auto Retouch] and tap [Detailed Settings].
-
To apply the Preset Settings as they are
Tap the corresponding preset name. Setting is complete. (Skip Steps 5 to 7.)
To edit the image using the Preset Settings as a base
Tap […] on the right side of the corresponding preset name, and tap [Edit the parameter based on this preset].
If you do not want to use the Preset Settings
Select [Set without preset].
- After the smartphone images are loaded, select an image to be used as a retouch sample.
- Use [Filter] and [Parameter] at the bottom to set your preferred filter and parmeter.
- For filters, tap the selected item again to adjust the level.
- After completing adjustment of all items, tap [Save] in the upper right.
6-3. Gallery Password Setting
You can set a password for a gallery. You can set separate passwords for Story Galleries and Live Galleries.
6-3-1. Setting a password for a Story Gallery
-
Open the project you want to set a password for, tap (Menu) at the upper left, and then select [Project Settings].
- Enter a password of your choice, 8 to 16 characters in length.
- Tap [Save] in the upper right.
- Make sure to inform the client of the password when you send them the URL of the gallery.
6-3-2. Setting a password for a Live Gallery
-
Open the project you want to set a password for, tap (Menu) at the upper left, and then select [Project Settings] → [Live Gallery].
- Tap [Password setting] under [Browsing password] and enter a password of your choice, 8 to 16 characters in length.
- Tap [Save] in the upper right.
- Make sure to inform the client of the password when you send them the URL of the gallery.
- To delete a password, make sure the entry field is blank and then save the setting.
- When you change the password of a gallery that has already been published, simply changing the password of the project causes the new password to take effect. (It is not necessary to republish the project.) If you delete the project from your local device, you can still change the password on the Creators' Cloud website. This also applies to adding new passwords and deleting passwords.
6-4. Photographer Information Settings
The watermark to be inserted into the image, and the nicknames and contact details to be displayed in the gallery can be set.
- On the [Project List] screen, tap the upper left menu (Menu) → [Settings] → [Your information].
- Enter the required information.
Watermarked Images
Photographer names or other identification can be added as a watermark to photos in the story galleries delivered to clients.
- PNG and JPEG files can be used as watermarks. When a JPEG file is used, it is layered over the images at 50% transparency.
- Watermarks are layered over images in the story galleries (1080 pixels on the short side) in the lower-right corner in a size that will fit in a square measuring 250 × 250 pixels. If the watermark is smaller than 250 × 250 pixels, it is overlayed without resizing.
- Movies and Live Gallery images are not watermarked.
6-5. Deleting Data
6-5-1. Cache deletion
After uploading to the cloud, images on the mobile device can be deleted. This does not affect images in the cloud story gallery.
- Open the project, and then tap (menu in the upper left) → [Project Settings] to open the project editing screen.
- Tap [Delete Images in this smartphone].
- For subsequent editing, open the project again. This triggers syncing with the cloud and downloads story gallery images (including images that were not selected or streamed).
6-5-2. Delete Project
Projects can be deleted in either of the following ways.
Delete from the [Project List] screen
On the [Project List] screen, tap ![]() (Settings) to the right of the project and then [Delete Project].
(Settings) to the right of the project and then [Delete Project].
Delete from [Project Settings]
- Open the project and tap (menu in the upper left) → [Project Settings].
- Tap [Delete Project].
- Deleted projects cannot be recovered.
6-5-3. Deleting a Story Gallery
Story galleries delivered to clients are automatically deleted after the expiration date. If for some reason you wish to delete story galleries (make them inaccessible) before this date, do the following.
- Sign in to the Creators' Cloud website.
- Delete the project in the Visual Story project information section.