Image Management Software
PlayMemories Home Support
|
PlayMemories Home enables you to import (save) the photos and videos you photographed to a computer easily.
Note when you import directly from the memory card
Even when you import videos recorded by Sony-made cameras to your computer, it is required to connect the camera by USB connection for authenticate (first time only).
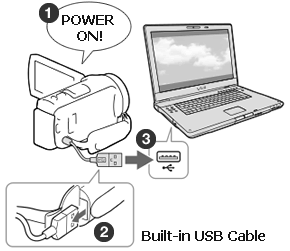
Turn on the computer. Insert the fully-charged battery into the camera and switch the camera power.
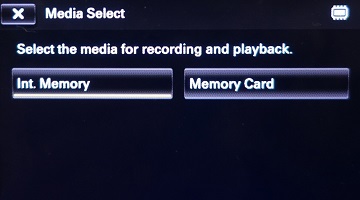
Select the media where the images to be imported are stored by selecting [MENU] > ![]() [Setup] > [Media Settings] > [Media Select].
[Setup] > [Media Settings] > [Media Select].
When selecting [Memory card], make sure that the memory card is inserted into the camera.
Connect the camcorder to the computer by using the built-in or supplied USB cable.
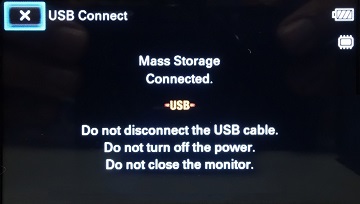
When the below screen is displayed, click [Yes].

When the connection is made correctly, you will get a message saying [Mass Storage connected] on the LCD screen of the camera. You can not import into PlayMemories Home by MTP connection.
Cautions before the image import is complete
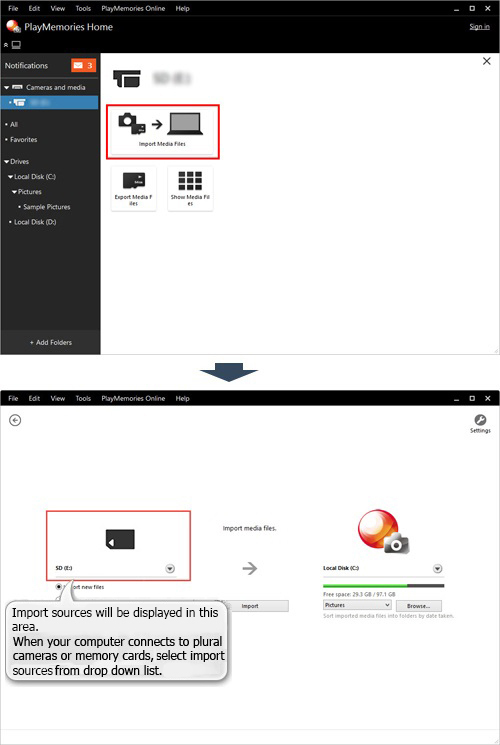
PlayMemories Home will start. The image import window will be displayed when you select [Import Media Files].
One-point
You can also open the importing screen from the main screen of PlayMemories Home. Select [Camera and media], then click [Import Media Files].

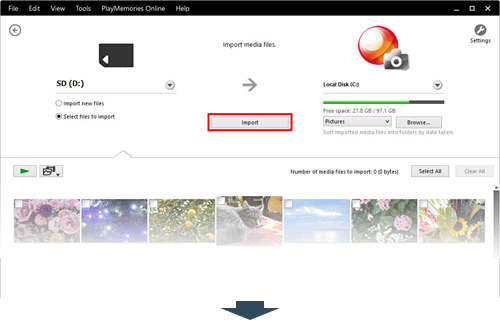
When you select [Select file to import], the photos and videos in the camera or the memory card are displayed. Check on the checkbox of the images you want to import.
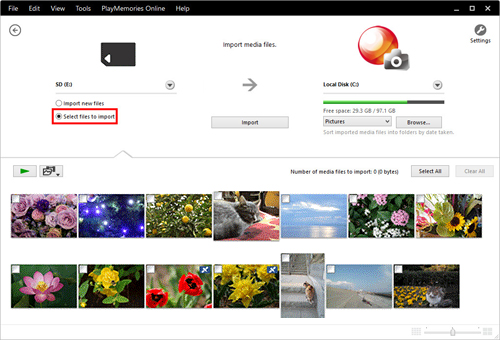
Select destination folder to which the images are saved.
By default, the folder will be created in my picture based on the filming date to import file.
 .
. .
.
Click [Import].
Import completed
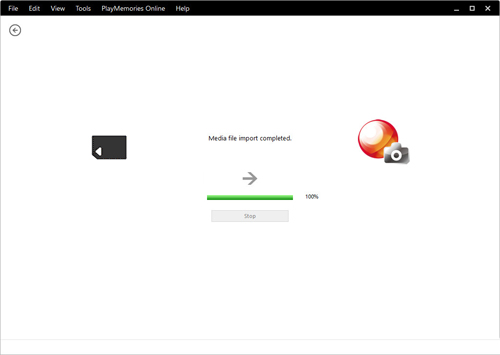
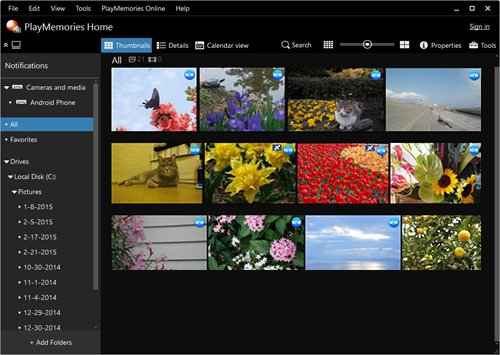
The imported photos and videos are displayed in the PlayMemories Home window.
One-point
The  icon is attached to the photos and videos that have just been imported.