
 Image Management Software
PlayMemories Home Support
|
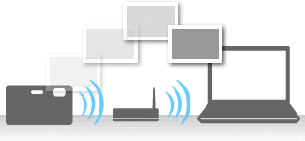
PlayMemories Home enables you to wirelessly store the photos and videos from Cyber-shot to a computer easily.
You need:
The following steps 1 and 2 are required only when using for the first time or after changing the import destination.
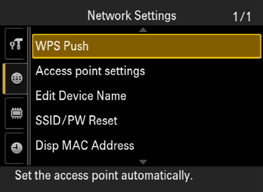
1.1. Is there a WPS button on the access point?
If Yes:
Select [MENU] > [Setup] > [WPS Push] on the camera. Follow the instructions and press the WPS button on the access point within 2 minutes. When the message [Registered] appears, access point registration has finished. Skip the next step and go straight to <2. Registering the destination computer>.
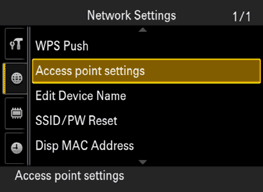
If No:
Confirm the SSID (network name) and password (encrypted key or security key) on the access point. Select [MENU] > [Setup] > [Access Point Settings] on the camera, and proceed to ”1.2 Is the access point displayed on the camera?”.
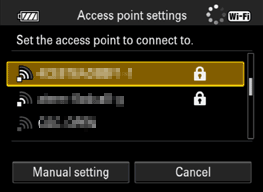
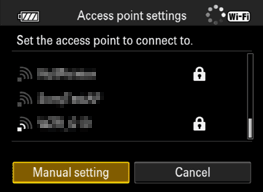
1.2. Is the access point displayed on the camera?
If Yes:
Select the access point. The access point with a key icon requires entering the password; in this case, select the entry field to display the keyboard, and then enter the password. Follow the instructions. When the message [Registered] appears, access point registration has finished. Skip the next step and go straight to <2. Registering the destination computer>.
If No:
Select [Manual Setting] and proceed to "1.3. Does your access point accept the WPS PIN code?".
1.3. Does your access point accept the WPS PIN code?
If Yes:
Select [WPS PIN]. Input the 8-digit number displayed under [PIN code] to the access point within two minutes. The PIN code will change every time. Refer to the manual for your access point when inputting the number. When the message [Registered] appears, access point registration is finished. Skip the next step and go straight to <2. Registering the destination computer>.

If No:
Select [Manual Regist] and proceed to "1.4 Enter the settings for manual registration."

1.4. Enter the settings for manual registration.
Select the entry field for the SSID to display the keyboard, and then enter the SSID. Follow the instructions. When the message [Registered] appears, access point registration is finished. Go to the next step .


Only one computer can be set as a destination computer on the camera. If you need to change the computer, you have to repeat this procedure again.
2.1. Start PlayMemories Home on the computer.
2.2. Turn on the camera, and connect the camera and computer by USB connection.
2.3. Select the camera on the [Camera and media], then click [Wi-Fi Import Settings].

2.4. When you are asked how to set up Wi-Fi import, select [Recommended] and click [Next].
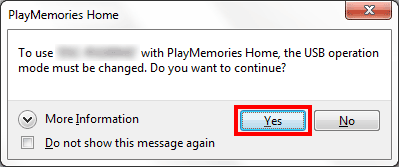
2.5. If you are asked to allow the program to make changes, click [Yes].

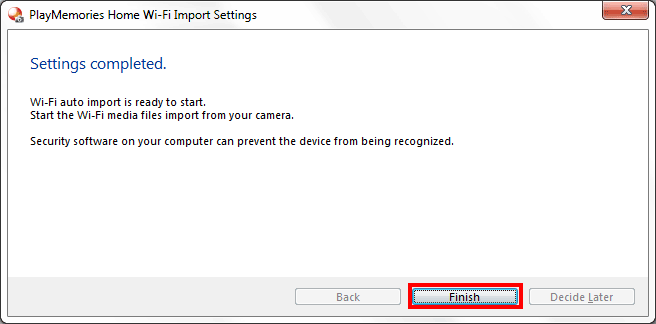
2.6. When the [Settings completed] message appears, click [Finish].
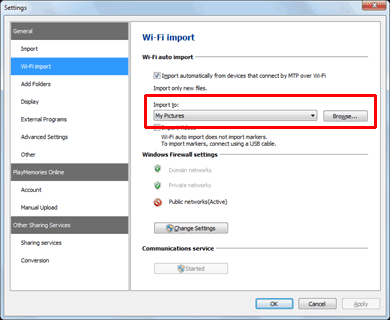
2.7. Select the destination folder.
By default, the destination folder is [Picture]. If you want to change the destination folder, start PlayMemoris Home, and then select [Tools] on the menu > [Settings...] > [Wi-Fi import] > [Wi-Fi auto import] > [Import to] > [Browse].
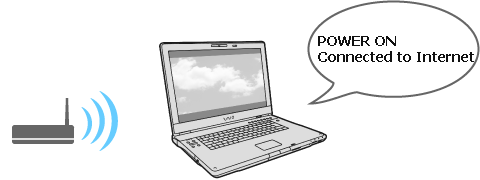
3.1. Turn on the computer and the access point (Wireless LAN router), then connect the computer to Internet.
3.2. Insert the memory card and turn on the power of your camera.

3.3. Select [MENU] > [Wireless] > [Send to Computer] on the camera.
To send videos using Wi-Fi:
3.4. Image data transfer starts.
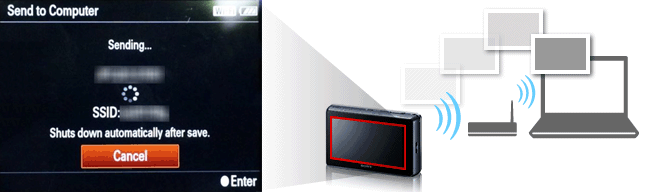
The image being transferred is displayed at the lower right of the computer screen during image transfer.

