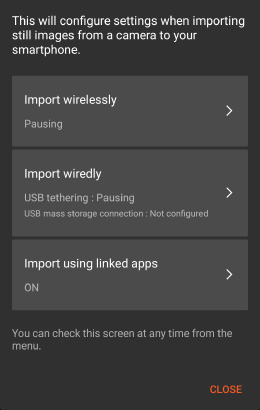
1. Installing the application
1.1. Installing the application
- Install Transfer & Tagging to your mobile device.
- Start up Transfer & Tagging, and create or sign in to your Sony account in accordance with the instructions.
- When installation completes, a screen showing a list of images is displayed. (It is empty immediately after installation.)
- For Android OS, if you set this app as a power-saving exception, it will operate even when the smartphone is in sleep mode.
- For iOS, if the smartphone goes into sleep mode or you run another app, the app will stop operations such as importing.
1.2. Location where images are stored (Android only)
The default setting specifies that images are saved in the DCIM folder of the smartphone, but you can change this so that images are saved to the in-app folder (the internal storage area of the app).
- To use the digital signature function, it is necessary to save images to the in-app folder.
- If you want to edit images using other applications, it is useful to save images to the DCIM folder. If you want to edit images saved in the in-app folder using another application, use the image sharing function.
- It is not possible to save images to both locations. Also, in order to change the location where images are stored, you will first need to delete all images imported using Transfer & Tagging.
- At the top left of the screen, select
 (MENU) → [Clear data] to delete all imported images.
 - Select (MENU) → [Setting] → [Image Save Folder] and select a location of your choice.
Hint
After deleting the images, reimport them from the camera if necessary. Alternatively, you can copy images to a different location as described in “3.1.4. Sharing images.”
Points requiring caution when updating from Ver. 2.2 or earlier to Ver. 2.3 or later
Selection of the location where images are stored is a function available in Transfer & Tagging 2.3 and later. Refer to the following when updating from an earlier version.
Updating from Ver. 2.2 to Ver. 2.3 or later
In Ver. 2.2.0 and 2.2.1, images are stored in the in-app folder.
If images were moved to the in-app folder when you updated to Ver. 2.2, updating to Ver. 2.3 or later does not change the location where images are stored, which remains the in-app folder. To change the storage location to the DCIM folder, follow the steps listed above.
If images were not moved to the in-app folder when you updated to Ver. 2.2, you will need to choose whether to move all images to the DCIM folder or to the in-app folder when updating to Ver. 2.3 or later. Follow the instructions in the message to select the storage location.
Updating from Ver. 2.1 (or earlier) to Ver. 2.3 or later
On Ver. 2.1.x or earlier, images are stored in the DCIM folder. Updating to Ver. 2.3 or later does not change the location where images are stored, which remains the DCIM folder.