3.4. Digital signature function
Depending on your camera model and the country or region where you reside, you may be able to use the digital signature function. You can also retain the digital signature when editing images to which the camera assigned a digital signature when they were shot.
- The only items that can be edited are those accessible using [Edit] (editing metadata, cropping, rotation, and inclination correction).
- To use the digital signature function, it is necessary to first save images to the in-app folder. See below for details.
- The digital signature function will initially be made available to customers affiliated with certain news organizations. We will make an announcement when it becomes available to other customers.
Enabling writing of digital signatures
- Select Menu
 → [Setting] → [Digital Signature].
 - Enable [Write Digital Signature].
- Select [Certificate for C2PA], then tap [Download and configure certificate].
- If [Add time stamp when signing] is enabled, a time stamp will be added when images are uploaded to an FTP server.
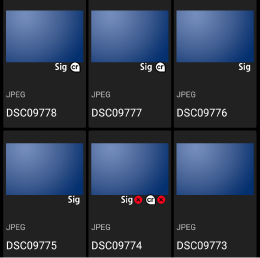
 |
Image with digital signature assigned |
|---|---|
 |
Image to which a digital signature has been assigned that has become invalid |
 |
Image with C2PA-compliant digital signature assigned |
 |
Image to which a C2PA-compliant digital signature has been assigned, the certificate of which has expired. Check the expiration dates of the certificates on both the camera and in Transfer & Tagging.
|
 |
Image to which a C2PA-compliant digital signature has been assigned that has become invalid. Check to make sure the digital signature settings on both the camera and in Transfer & Tagging are valid.
There are various reasons why a signature may become invalid. For details, refer to section 16.1.2 “Failure codes” in “C2PA Technical Specification v1.3” published by C2PA. |
| No icon | Image with no digital signature assigned |
C2PA-compliant digital signatures
After enabling the camera’s digital signature function and reading the C2PA certificate into the camera, the camera becomes capable of writing C2PA-compliant digital signatures to images. Then, when an image is edited in Transfer & Tagging after writing of digital signatures has been enabled, the edit history is written to the image, allowing the image’s authenticity to be verified.