Selecting images (zooming in, stepping forward, and filtering)
When you have shot a lot of images and need to compare or select images, zooming in or filtering images can be useful, in addition to thumbnail display or comparison display.
Zooming in on images
In the Preview Display and Comparison Display, you can zoom in on images and easily check if they are in focus.
You can zoom in or zoom out on images either by using the 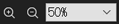 (Zoom Tool) control on the toolbar or by pressing the right or left arrow key while holding down the Ctrl key (Windows) or Command key (Mac) on the keyboard.
List of keyboard shortcuts
Stepping forward
- You can step forward or backward through the images one frame at a time by pressing the right or left arrow key on the keyboard. (Example 1)
- By pressing the right or left arrow key on the keyboard while zoomed in on an image, you can step forward or backward through the images in the zoomed state with each image displayed in the same position within the frame. (Example 2)
- When viewing images shot on a camera* supporting focus frame display in Viewer, you can step forward or backward through the images in the zoomed state with each image displayed centered on the focus frame used when shooting by pressing the right or left arrow key while holding down the Shift key and the Ctrl key (Windows) or Command key (Mac) on the keyboard. (Example 3)
* Refer to the “Focus Frame Display in Viewer” item on the Supported Devices page.
Supported Devices
Examples of stepping forward through images shot on a camera supporting “Focus Frame Display in Viewer”
- Example 1

- Example 2

- Example 3

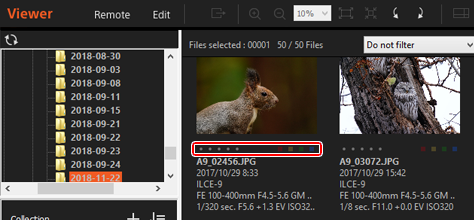
Filtering images (Rating / Color label)
You can filter images according to 5 ratings or color labels. You can also develop all the filtered images at once.
-
Use either of the following methods to add a rating or a color label to an image.
- Display the image that you want to rate. Then, click
 (Rating) to set the number of star marks.
 - Display the image to which you want to add a color label. Then, click
 (Color label) to assign the desired color label.
- Display the image that you want to rate. Then, click
-
Use the filter bar in the thumbnail area or the [Filter] item on the [Tools] menu to filter the images displayed by attributes such as rating, color label, or file format.
Only thumbnails of the images that match the filtering conditions are displayed.

-
A Filter
Select the rating (number of star marks), model name, or lens name that you want to use for filtering. You can cancel the filter by selecting [Do not filter].
-
B File format
Select a file format to filter.
-
C Color label
Select the color label to filter.
-
D Clear button
Cancels all filtering. Thumbnails of all the images are displayed.
-
Hint
- To develop all the filtered images at once, select all of the RAW data that you want to develop, and then click
 (Output) on the toolbar.
Exporting images into the JPEG or TIFF format (developing images) - To use ratings that you set in Viewer for other software that supports XMP (such as Adobe Lightroom), select [Export Rating, Color Label to XMP Information] from the [File] menu.