Creating Time-lapse Movies
In Viewer, you can create a time-lapse movie using multiple still images in JPEG or RAW format.
Not only can you use a series of still images captured using interval timer shooting, you can also use still images you select yourself. Note that only images in JPEG format can be used in movie editing, so any RAW images you select will be converted to JPEG.
Tutorial video for creating time-lapse movies (For Windows)
Hint
- To change the language for subtitles, select
 (Settings) at the lower right corner > [Subtitles] > [Auto-translate], and select the desired language.
Creating a Time-lapse Movie
-
Launch Viewer.
-
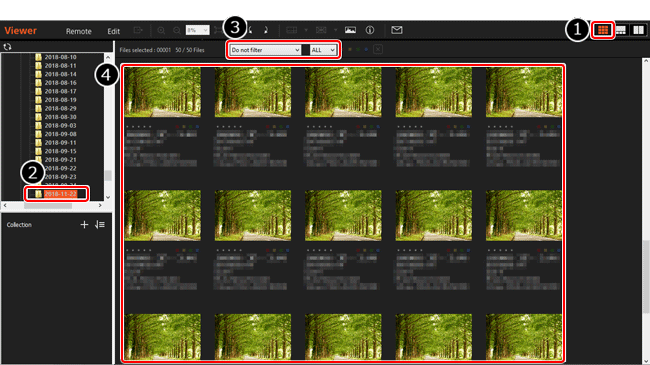
Click
 (Thumbnail Display) in the upper right of the window → select at least 15 images.
Time-lapse movies are created with images in the order of the date/time they were shot.
* You cannot create time-lapse movies in comparison display.
-
In the [Tools] menu, select [Create Time-lapse Movie].
If you select a large amount of images such as several thousands, it may take a few minutes to process. If the message “Processing” appears, wait for a while, then try again.
-
Make the necessary settings, and click [Continue].
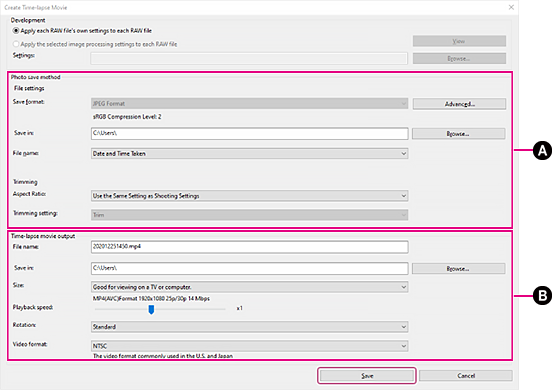
- A Photo save method
Specify a save location and trimming settings for still photos.
- B Time-lapse movie output
Specify a file name and save location for the movie file.
Hint
- To create movies without black bars on the left and right side for shots that were taken at a 16:9 aspect ratio, set "Aspect Ratio" in "Trimming" to [Use the Same Setting as Shooting Settings].
- The color space of the created time-lapse movies will be sRGB.
- A Photo save method
-
When “All processing completed” is displayed, click [Close].