Focusing automatically on a subject
Use the following functions to help you focus automatically.
- Setting the camera based on subject movement: [Focus Mode]
- Choose how to focus based on subject movement.
- Setting the camera based on subject position or size: [Focus Area]
- Choose the best focus area based on subject position or size.
Hint
When you shoot using the monitor, you can specify where to autofocus and shoot by touching a position on the monitor.
Focus Mode
Setting the camera
Press the Still/Movie/S&Q button to select the still image shooting mode.
The following icon  is displayed at the upper left on the monitor in the still image shooting mode.
[Focus Mode]
MENU →  (Camera Settings1) → [Focus Mode] → Select your preferred setting from the
  [Single-shot AF],
  [Automatic AF], or
  [Continuous AF] option.
Guide to using the camera
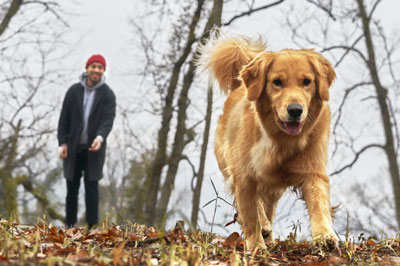
Focusing based on subject movement
Adjust the [Focus Mode] setting to suit subject movement.
[Single-shot AF]
[Automatic AF]
The camera determines to switch between [Single-shot AF] and [Continuous AF] according to the movement of the subject.
When the shutter button is pressed halfway down, the camera locks the focus when it determines that the subject is motionless, or continues to focus when the subject is in motion. During continuous shooting, the camera automatically shoots with [Continuous AF] from the second shot.
[Continuous AF]

In
[Continuous AF] mode, there is no beep when the camera focuses.Related camera help guide
Focus Area
Setting the camera
Press the Still/Movie/S&Q button to select the still image shooting mode.
The following icon is displayed at the upper left on the monitor in the still image shooting mode.
[Focus Area]
MENU→ (Camera Settings1) →[Focus Area] →desired setting.
Related camera help guide
Guide to using the camera
Focus Area
Choose the best focus area based on subject position or size.
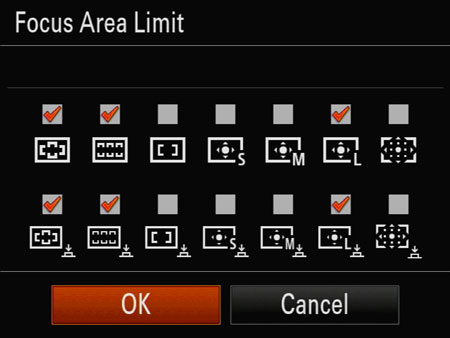
Only [Wide], [Zone], [Flexible Spot: L], [Tracking: Zone], and [Tracking: Flexible Spot L] are displayed as options in the default settings. To select other types of focus areas, add a check mark to the focus areas you want to use with the [Focus Area Limit] function.
 [Wide]
When you press the shutter button halfway down in the still image shooting mode, a green frame is displayed around the area that is in focus.
 [Zone]

 [Center]

 [Flexible Spot]
  [Expand Flexible Spot]


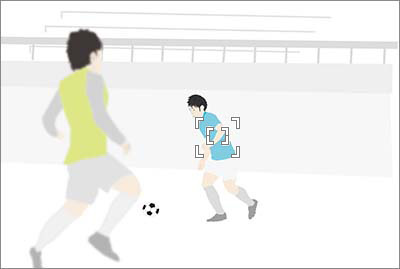
 [Tracking]
Related camera help guide
Select Focus Area based on the subject size on screen
Use the size of the subject on screen as a rough guide to decide the size of the focus area, such as [Flexible Spot].

For [Flexible Spot], the subject should be large enough to cover the whole Focus Area (as a guideline). Having the subject at this size prevents the focus from drifting to the background.
For [Expand Flexible Spot], the focus area including the expanded area should just about overlap with the subject (as a guideline).
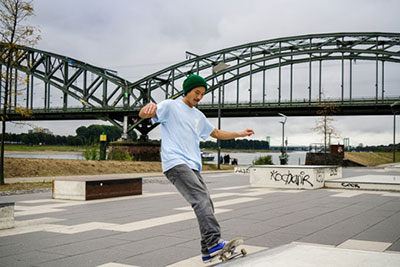
Even when you are shooting the same skating scene, the optimal Focus Area size depends on the subject size on screen.
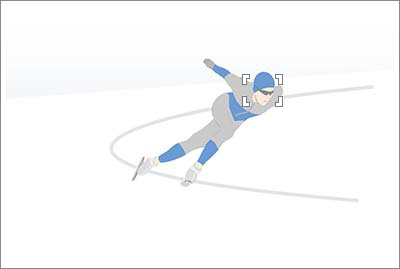
[Flexible Spot: M] is recommended for focusing on the subject’s (skater’s) face. If set to [Zone], other features such as line marks on the skating rink will fall inside the area and the camera might focus on those features instead of on the skater.
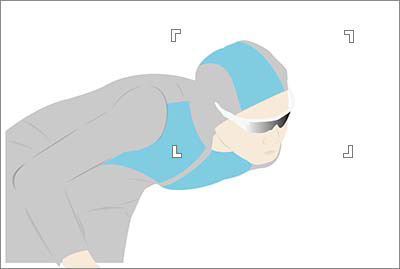
To target a fast-moving subject at this size using a long focal length, try a wider setting such as [Zone].
Quickly switching to frequently used focus areas
To quickly switch to the types of focus areas you use most often, first select these areas in [Focus Area Limit]. By assigning [Switch Focus Area] to a custom key, you can switch to your other selected focus areas one after another each time you press that key.
Setting the camera
-
MENU →
(Camera Settings1) → [Focus Area Limit] → add check marks to focus areas you will use, and then select [OK]. -
After selecting MENU →
 (Camera Settings2) → [Custom Key], select [Switch Focus Area] for the button to assign.
Related camera help guide
Moving the focusing frame
When [Focus Area] is set to [Zone], [Flexible Spot], [Expand Flexible Spot], [Tracking: Zone], [Tracking: Flexible Spot, or [Tracking: Expand Flexible Spot], the triangles are displayed on the top, bottom, left, and right sides of the focusing frame. The focusing frames can be moved by using the top/bottom/left/right sides of the control wheel.

Focusing frame is ready to move (When [Flexible Spot] is selected)
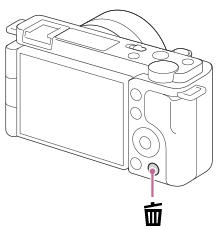
To center a focusing frame on the screen, press the  (Delete) button.

Focusing frame in the upper left

Centers the focusing frame
Press the center button to lock the focusing frame position.

Focusing frame is locked (When [Flexible Spot] is selected)
Either select [Zone], [Flexible Spot], or [Expand Flexible Spot] in [Focus Area] again or use the custom key to which you have assigned the [Focus Standard] function. Once you have assigned the [Focus Standard] function to a custom key, you can move the focusing frame by simply pressing the assigned key.
Related camera help guide
Hint
By touch, you can choose where to focus.
*The menu screen images on this web page have been simplified for display purposes, and do not exactly reflect the actual screen display of the camera.