Focusing on an animal’s eye (Shooting movies)
Use the following procedure to take pictures by focusing on an animal’s eye.
There are three shooting methods. Use the method that is suitable according to the shooting conditions.
* This function can be used when the camera’s system software (firmware) is Ver. 2.00 or later.
- This function is recommended when shooting an image while viewing it on the monitor, so that you can focus on the subject easily by touching and selecting the subject on the screen.
- When you want to focus on a subject with higher priority on the eye but want to continue focusing using [Focus Area] in case detecting an eye is difficult.
- This function is recommended if you want to adjust focus by key operation when it is difficult to perform touch operation, for example, when shooting an image while looking through the viewfinder.
- When you want to focus temporarily on an eye within the whole range of the monitor, regardless of the setting for [Focus Area]
- When you want to focus temporarily on an eye using [Eye AF] after focusing on a subject using
 (Manual Focus)
When you want to focus on an eye by touch operation ([Touch Tracking])
Setting the camera
Press the Still/Movie/S&Q button to select the movie recording mode.
The following icon  is displayed at the upper left on the monitor in the movie recording mode.
-
[Face/Eye AF Set.]
MENU →
 (Camera Settings1) → [Face/Eye AF Set.] → [Face/Eye Prty in AF] → [On].
MENU → (Camera Settings1) → [Face/Eye AF Set.] → [Subject Detection] → [Animal]. -
[Focus Mode]
MENU →
(Camera Settings1) → [Focus Mode] →  [Continuous AF].
 -
[Touch Operation]
MENU →
 (Setup) → [Touch Operation] → [On].
 -
[Func. of Touch Operation]
MENU →
 (Camera Settings2) → [Func. of Touch Operation] → [Touch Tracking].
Guide to using the camera
Focusing on an eye by touch operation ([Touch Tracking])
Select the face of a subject by touch operation ([Touch Tracking]).
When the eye of the selected subject is detected, a white frame appears around the eye and you can continue to focus on the eye.
When the eye detection frame (white) is displayed
Note
- The camera may not be able to detect an eye depending on the subject or shooting environment. For details, refer to the section “About Eye Detection.”
The link between Tracking and [Face/Eye AF Set.]
If you set [Face/Eye AF Set.] to focus on eyes beforehand, a focusing frame will automatically appear around any detected eye while tracking a subject.
-
Tracking distant subjects
-
If an animal eye is detected when the subject comes closer, a focusing frame will automatically appear around the detected eye.
When you want to focus on an eye using the focus area
Setting the camera
Press the Still/Movie/S&Q button to select the movie recording mode.
The following icon is displayed at the upper left on the monitor in the movie recording mode.
-
[Face/Eye AF Set.]
MENU →
(Camera Settings1) → [Face/Eye AF Set.] → [Face/Eye Prty in AF] → [On].
MENU → (Camera Settings1) → [Face/Eye AF Set.] → [Subject Detection] → [Animal].
MENU → (Camera Settings1) → [Face/Eye AF Set.] → [Animal Eye Display] → desired setting. (When [On] is set, the white eye detection frame appears over the eye.) -
[Focus Mode]
MENU →
(Camera Settings1) → [Focus Mode] → [Continuous AF]. -
[Focus Area]
MENU →
(Camera Settings1) → [Focus Area] → desired setting.
Guide to using the camera
Focus on an eye using [Focus Area]
Since the camera focuses on the animal’s eye in the focus area, set [Focus Area] to [Wide] if you want to detect an eye in a range that is as wide as possible.
If you want to limit the range for detecting an eye, set [Focus Area] to settings such as [Flexible Spot] or [Zone].
Example of condition where the camera can focus on an eye
In this section, the procedure for setting the focus area is explained in the condition where [Animal Eye Display] is set to [On].
-
Point the camera so that the animal’s eye to be focused on are within the focus area.
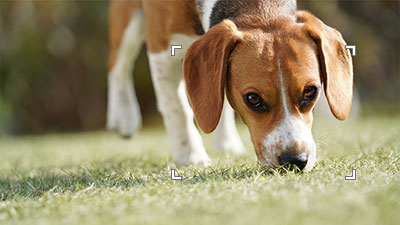
When [Focus Area] is set to [Zone]
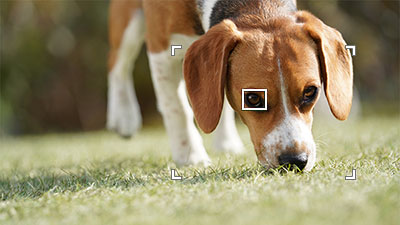
-
When the camera can focus on the eye of an animal, a white eye detection frame is displayed over the eye.
Hint
- Setting [Subject Detection] to a custom key is useful when you want to switch [Subject Detection] quickly.
- When you want to focus on a specific eye of an animal when the face displayed in the screen is small or several animals are displayed at the same time, select a subject to be tracked using touch operation or focus on the subject by setting [Focus Area] to [Flexible Spot] to make it easier to detect the eye.
Note
- The camera may not be able to detect an eye depending on the subject or shooting environment. For details, refer to the section “About Eye Detection.”
When you want to focus on the eyes using the [Eye AF] function via a custom key
Setting the camera
Press the Still/Movie/S&Q button to select the movie recording mode.
The following icon is displayed at the upper left on the monitor in the movie recording mode.
-
Custom Key
After selecting MENU →
(Camera Settings2) → [Custom Key], select [Eye AF] for the button to assign. -
[Face/Eye AF Set.]
MENU →
(Camera Settings1) → [Face/Eye AF Set.] → [Subject Detection] → [Animal].
Guide to using the camera
Focusing on an eye by pressing the custom key to which [Eye AF] is assigned
When you press the custom key to which [Eye AF] is assigned and the eye of an animal is detected, a white detection frame appears. If you zoom in on the subject under the condition where the camera cannot detect the eye, the eye detection frame may appear in some cases.
Note
- The camera may not be able to detect an eye depending on the subject or shooting environment. For details, refer to the section “About Eye Detection.”
About Eye Detection
Even when the subjects have cat- or dog-like faces, the camera may not be able to detect an eye depending on the shooting environment such as the type of animal, the direction of its face, and the conditions of the scene (e.g. two or more animals moving around).
Use the following examples as guidelines.
Examples of easy-to-detect subjects’ eye

Cat-like face

Dog-like face

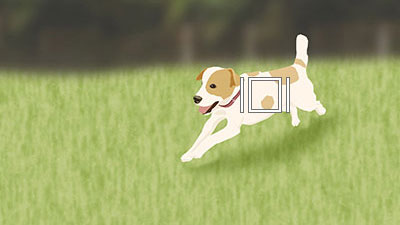
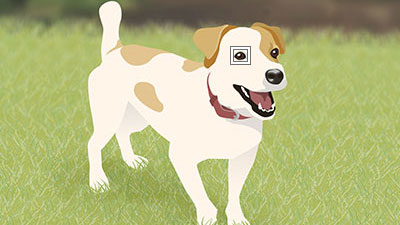
Size and direction of a subject where its entire face such as an eye or nose is seen properly
(Example:Face shown in front view)
Size and direction of a subject where its entire face such as an eye or nose is seen properly
(Example: Face shown sideways)
Examples of difficult-to-detect subjects’ eye

The subject animal has a spotted or striped face and body

When shooting in dark places or animals with dark hair

Animals that do not have cat- or dog-like faces

When two or more animals are moving around
Hint
- If the face of an animal is out of focus, the camera may not be able to detect the eye. In that case, adjust the focus on the face once. After that, the camera can detect the eye more easily.
- When shooting a fast-moving subject, the camera may have difficulty detecting an eye if the recording frame rate for movie shooting is low or the shutter speed is slow. To give higher priority to eye detection, try the following.
- Set the frame rate to the highest setting.
- Set the shutter speed to higher settings. (For example, set the shutter speed to 1/125 or 1/250 in accordance with the moving speed of a subject.)
*The menu screen images on this web page have been simplified for display purposes, and do not exactly reflect the actual screen display of the camera.